Frugal, or just plain cheap?

What will it cost to do this anyway?

Do I hunt for a better deal, or make progress faster? That is often the question with a project like this one.

You may think that money is not an issue for someone who can afford to buy a Tesla, but we all have our limits and this project has been one to push my comfort zone. I suppose that that’s part of what makes it all interesting as well. I find it rather amusing to watch my initial resistance and then my justifications for spending funds along the way. Much of my life I’ve been concerned with money and here I’m strangely driven toward a large optional expenditure. It’s not like I’m concerned about making rent or food budget here, I’m very fortunate in that way these days, but this does involve what I would call considerable sums from what most people would suggest I’d do better to save for retirement.

It all started with getting the Tesla base vehicle. Six months ago when I started this project my budget seemed simple. I’ll buy a totaled Model S for $18K or so (seems about right for a luxury wreck), throw in a few grand to get the essentials running and then it will take much labor but very little cash to merge it with the stretched Vanagon body. Not pocket change, but not bad at all for such a cool EV. Ah grasshopper, you have so much to learn. After losing a couple auctions with my low bidding limit I reconsidered my budget. Had I not justified $30K for a battery pack on the conversion project this replaced? And is not $10K a perfectly reasonable amount for a powerful drivetrain? What about the value of a huge panoramic sunroof? That practically essential tech package? Don’t I need a test bed for high power AC drives in order to further my business? That retirement fund isn’t earning much anyway and besides this is going to be fun! I’ll sell a few vehicles to help with the cash flow and free up some work space as well. Within a few weeks I had talked myself into a $40K bid limit. Not that I’d need that much, no, I’m sure I’ll get one for $30K. Did I mention how I used to teach “Creative Justification 101”? I waited and watched some more. A number of less than ideal auctions went by with issues, no air suspension, the smaller 60 kWh battery, $50K selling prices, those were not for me. After over three months of auction watching my car showed up. The damage was not too bad, it had almost every feature I wanted, lacking only the dual onboard chargers, and best of all the passenger air bags were all intact so the interior was perfect. Very nice! Not only that, the pre bid value closed at only $12,300. It’s not uncommon for the final bid amount to be twice the pre bid, but not often much more than that. I thought long and hard about my bid limits for this car the night before the auction deciding I would go as high as $38,200 but not to my $40K hard limit. If I didn’t get it for that then I’d accept it was “not meant to be”, thereby giving my guardian angels a vote.  Either I have a lesson to learn about expecting a good deal, or my guardian angels have a great sense of humor because the other bidders stopped at $38K and I won it for $38,100. As I watched it bid to $38K I knew I had to mentally let go, and even when I “won” it, I had to wait for the insurance to approve the sale since they had a $40K reserve, but I held tight and still won it. In the end auction fees, broker fees and shipping brought it to $42K.

$42K for a totaled car. What-Had-I-Done!? Prior to this, my most expensive car was a new Prius for about half that, and this one was a severe wreck. I just had to laugh. It started as a nervous laugh but now that the car has been here almost a month I can really laugh about how nutty it seems. Oh well, I reserve the right to do nutty things when I can, I guess it reminds me I’m alive. I’m grateful to have this freedom. The Stretch project in 1998 felt similar. Back then the front half was also the most expensive car I had bought by a factor of two and I promptly cut it up. It feels a bit like I’m trying to cut up my mental blocks. But this is not the end of those.

I think I got over the cost of the donor car. I’m still working on adjusting to the cost of luxury car parts. The steering rack mounting ears were broken in the accident. This is not uncommon in a wreck so you just replace the rack. I’m well accustomed to old Volkswagen prices and I normally pause a bit before I spend a few hundred dollars on a steering rack, but $3066.60 for one? This pause it taking longer.

Now I have a choice, do I buy a new rack or try for some alternative fix? Buying new is quick but costly. Alternatives take more time, carry more risk of lost time and money but can have hidden benefits. As a child I wanted a new go-cart, it was there in the Sears catalog and it would have been so cool! But buying a new go-cart was not an option in my family and so I had plenty of time to ponder alternatives. Eventually I built a much more creative go cart for almost no money and learned how to build things along the way. I’m not vouching for its safety, but I survived and gained valuable skills. I would have preferred the easy path of a new go-cart at the time, but the financial limitations forced me toward an education that my friends from wealthy families missed.

Back to the steering rack. If the Tesla were a few years older I might buy one from a wrecking yard for under $1000, but as of today I have not found a single Model S being sold for parts. A friend suggested having it welded so I took it apart. Now this part was fun, I’d never taken apart a modern EPS rack. If you are as curious as I am about these you can read about them here: It’s the high end Paraxial Servo Unit on page 8 and 9. I didn’t find this document until I had it apart, so I had the joy of discovering the fine brushless motor and belt, the integrated torque sensor and even how to put a few errant balls back in the recirculating ball gear before reading about them. With it apart I was able to take the housing to the finest aluminum welder in the region. He said there was a good chance he could weld it up, but complications such as the proximity of precision surfaces and my desire to run it on a heavy vehicle had me agreeing with him to look into other fixes first and only consider welding as last resort. The rack is made by ZF Lenksystems and with help from friends and Google we’ve found the cast housing may be the same as the one on a 2012 right hand drive Land Rover Evoque. There seem to be more of those in the scrap yards than there are Teslas. There’s one on eBay in the UK for $327, I’m awaiting more details from the seller to see if the housing is the same so I could swap it. Maybe this will work, but I’m warming up my justifications in case it doesn’t.

The steering rack is just the most expensive part. My list of parts to get it rolling comes to $8000.61 and I’m sure I’m missing some things. Many of the smaller parts are clearly worth buying but the air strut at about $1800 has me looking for alternatives as well. Eventually I’ll either find a workaround or get tired of looking for alternatives and just spend the money. I don’t want to wait too long to order parts since I hear Tesla parts sometimes have long lead times.

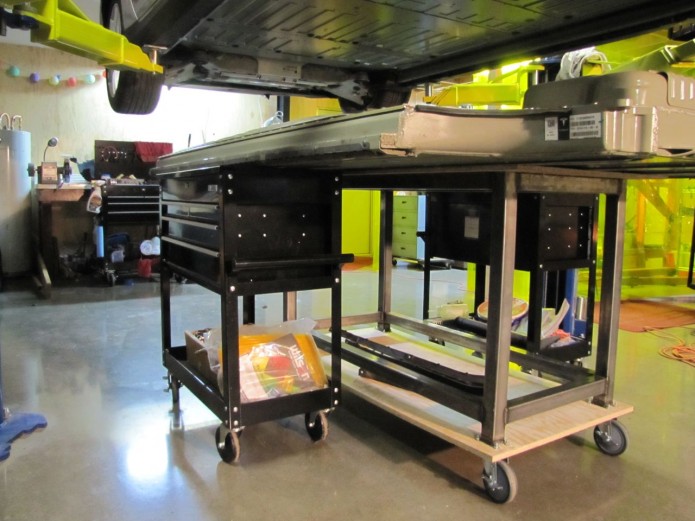
I wanted to write this post to let you know that I’m still working on it, even if it feels like nothing is happening on the outside. It may take some time to adjust my comfort zone, but with some minor delays the Stretchla will make progress.

Wheels are Turning

Before I start dismantling the Tesla and transferring parts to the Stretched Vanagon, I want to insure that all the Model S systems are working correctly. The condition of the battery, being the most expensive component in the car, has been of great concern to me. I wasn’t expecting much difficulty in getting it to wake up, charge and drive but things are often not as I expect. The Tesla is very new, and so far there is precious little public diagnostic information. The simple fact that a pyrotechnic disconnect on the 12V battery controls power to the contactors for the main traction pack was unknown to me, though in retrospect it makes perfect sense. I do appreciate the fact that doing things the hard way often entails more learning, and I’m certainly learning many obscure details about the Model S! It’s a good thing I enjoy learning about this sort of thing.

For this update I tried my hand at making a video blog entry, partially since so many people on Youtube were lacking context for my earlier time lapse videos and also to learn to use some new media tools. So here is the update:

Plug it in

After a few days trying to get the Model S high voltage system to wake up, I pull the rear covers and find that the shop that did the initial estimate taped over the battery connections and didn’t plug it in. I guess that would be the safest thing to do. It’s time I learn to drop the pack! 🙂

The Tesla Arrives

The eagerly awaited day has come

Yesterday at 8 AM I got a call from the carrier, my Tesla was on the way and should show up by 11. I must admit to being nervous. Everyone I spoke with about auto transport had stories of trouble; missed dates are common as are damaged vehicles which they claim were damaged when picked up. The shipper assigned to me had a BBB “F” rating and I noticed them being dishonest with me the first time I called them. Let me be very clear so no one gets the wrong idea, Tesla had nothing to do with this, it was organized by a broker that works with the insurance auctions. Thanks to warnings from others I paid my deposit at the time of order placement but withheld the bulk of the payment as COD. This seems to motivate them to actually deliver the car. In the end my Tesla showed up only a week late and aside from the missing key and lots of dirt from a cross country trip in the winter it seemed no worse for wear since it left the auction in New York. The battery pack, that most critical part, had a few new scratches but they were very minor and no worse than the ones caused during the initial accident. It seems they had been sliding the car on and off carriers with the parking brake on, clearly they had not studied how to turn the brake off (admittedly a challenging feat) . A call to the auction yard verified they had record of the key being picked up by the shipper with the car, contrary to the claims of the shipper and in the end we agreed that I would withhold the cost of a replacement key from the COD amount until they could produce the key. I suspect that I’ll never hear from them again. Most fortunately I had a second key that I had bought from the previous owner and so I was able to jump the 12V and unlock the parking brake to help it off the last truck. Many thanks to Arthur for arriving just in time to help me push the Tesla around and get it on the lift.

Damage Assessment

I’ve spent much of the last two days assessing damage from the accident. I’ve worked with a number of wrecked cars over the years, but this is my first aluminum one and I am very impressed with how it responded to the impact. I’ve worked with steel cars and aluminum parts before, but somehow it never really sunk in how well aluminum absorbs energy until I reviewed this wreck in detail. Of course aluminum by itself would do little without the impressive engineering that clearly went into the Model S design. The down side of the aluminum is that more of the front suspension is damaged than I had hoped and the old steel tricks of pulling it back in place and welding it up will not be appropriate. That’s a small price to pay for the well-being of the occupant. The subframe and upper frame have both been damaged. The electric power steering rack is broken off its mounts. I have a copy of the original parts cost estimate for the repair. Including body panels (which I won’t be needing) and not including a battery the total is about $29K. This does not include some other parts I’ve found damaged. Parts like the $3000 steering rack do give me pause. I’ll either need to find a creative way to fix it, find someone parting out a Tesla (I haven’t found anyone yet) or save up for new parts. It seems I get to work on my issues with “luxury car sticker shock”. 🙂

Next Step

My next step is to get the system happy enough that I can activate the HV (high voltage) system, check and charge the main battery and see that the drive motor engages. Pulling panels and inspecting parts is providing a fun education, I’m on the steep part of the learning curve for now. I’ve found that someone completely removed the “First responder loop” that normally would just be cut. This wire has one wire loop to disconnect the SRS and another that shuts off the HV battery system. It’s not surprising the car won’t drive or charge without it. The first responder loop consists of 2 wires with each shorting 2 pins on a 4 pin connector. With my service center being a 3 hour round trip away I was trying to figure out the wiring so I could jump it until I get a new cable.  With no service manual or wiring diagram available to the public (at least that’s seems to be the case for now) it’s certainly a challenge.  I’ve traced one of the 4 terminals, but am still pulling panels to try to trace the others so I can be sure of the functions. In the meantime, while I’m trying to find replacement parts for something less than full retail price I’ll work on fixing subsystems and hopefully whittle away at the 10 to 12 error messages usually on the screen. There’s everything from “windshield washer low” to “Needs service contact Tesla”. Mostly they have to do with much fluid being lost in the wreck . Speaking of errors, that never ending triple beep that plays anytime I’m in the car is getting a bit old. In the old days you’d just reach up under the dash and pull what was vibrating, but we live in a new world. I’ve also found that it’s hard to do anything inside without turning the car on. Once I tried to manually open the door with the key far way and the darn alarm went off, dual horns bouncing off the shop walls. I’m no fan of alarms and hope I can disable this one someday. I can power the car down on the center screen and as soon as I get out it turns back on. It seems the only way to get quiet time while I’m inside is to disconnect the 12v battery. No doubt about it, this car is very modern! Reviewing the forums I find there are many operational tricks I have yet to learn, maybe making it stay shut down and quiet is one of those.

Planning

Remember that musing I had about dropping down to 18″ wheels in my last post? As with so many things early in the planning process, it was pure fantasy. One look at the steering knuckle, still connected to the loose wheel, shows that there is no way a smaller wheel is going to clear on the front, no matter what the brake caliper clearance is. I’ve put up a WTB post for a used wheel and tire (or two) on the TeslaMotorsClub Forum.  On the plus side, the sunroof works very well and looks like it certainly could fit the Vanagon roof, helping with an aerodynamic transition to the pop top height. It’s a beauty! Here is a short time lapse of the arrival and a few pictures of the car and the damage.