A Flat camping bed for the Tesla Model Y
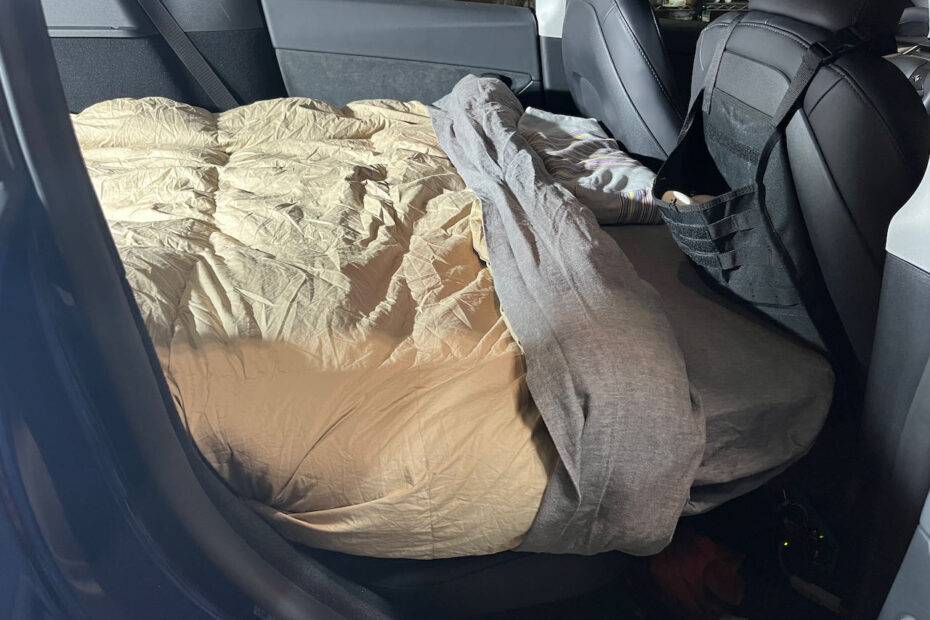
I like a comfortable camp bed. I love my mattress and bedding setup, if only the seats on the Model Y folded flat. Unlike the model 3, the Model Y has positive stops that hinder flattening the seat backs by compressing the cushions. In this post I describe my preferred bedding set and detail the seat mechanism modifications to flatten the rear seat sleeping area.
I have seen other creative solutions for a flat sleeping area in the Y. The ones I saw either reduced the head room, reduced access to the rear storage and/or deleted the rear seats. My priorities include headroom, storage and occasional rear seat use so those values directed these modifications.
MY Tesla is a 5 seat Fremont built in 2023. Yours may be different.
Mattress and bedding
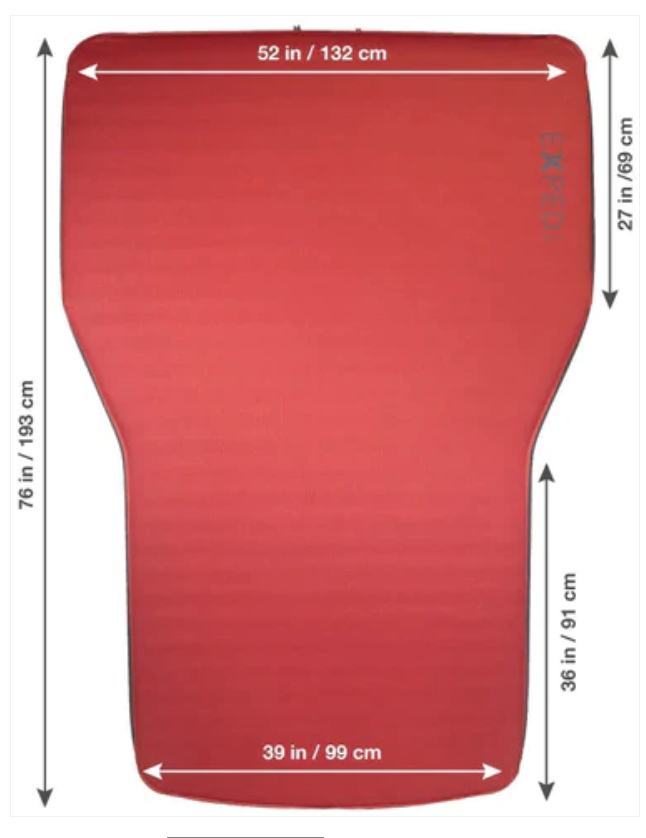
After sleeping on a few combinations pads and mattresses, I decided to get serious and bought the XPED Megamat Auto (earlier called the Megamat TXY) that many people on the Tesla Camping Facebook page were recommending.
I also bought a twin flannel sheet set – big enough for the widest part, an all season 75% down comforter – nice balance of warm and packs up small, and buckwheat husk pillow – I remove about 1/2 of the buckwheat pillow husks for my preferred firmness.
The mattress extends a bit over the end of the seat backs when inflated. Generally I find it is stiff enough as it is. I usually have plenty of things stuffed below it in the rear footwell that can be arranged to provide more support if needed.
Although I use a car vacuum to fill and deflate the XPED, I’m careful not to overinflate it. Beware that XPED has a warning about electric pumps that says:
“You can use the EXPED Widget electric pump to inflate your mat. The Widget is relatively low power and can be used for all EXPED mats and pillows. We do not recommend the use of any electric pumps other than the Widget because overinflating your mat or pillow can cause irreparable damage.”
My EXPED came with a manual Mini Pump for inflation, which is nice to have along as a backup. Just like the Widget electric pump,I don’t think it works for deflating.

My vacuum works well but has drawbacks to be aware of. First off, the battery (Two internal 18650’s with attached BMS) will self discharge over a period of several weeks or months. I fear the cells would be destroyed if the unit is left discharged for too long. Also, after a cold night the unit only runs for a split second before shutting down – probably due to the high internal resistance of cold batteries. The batteries can be warmed up by turning it off and on again many times, or by charging it for a few minutes until it will stay on. As a car vacuum it’s pretty weak, but I’ve appreciated it for cleaning up minor spills. It makes quick work of inflating and deflating the mattress.
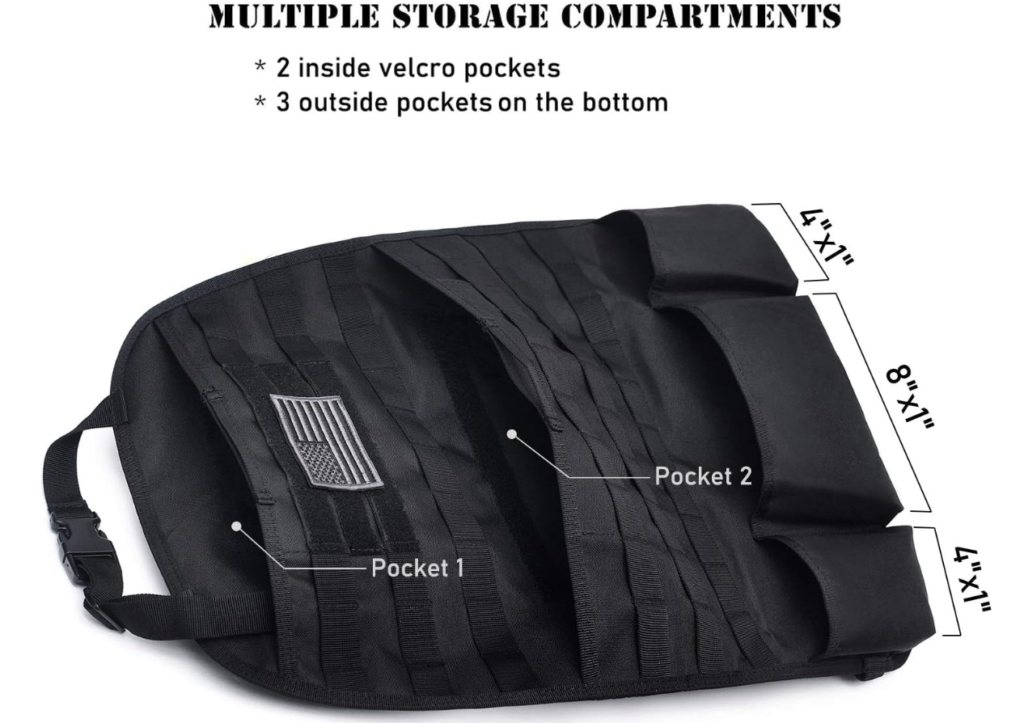
I store the vacuum in the seat back organizer, very handy. I also used Velcro straps to tie the bed bundle.
How to get a flat bed
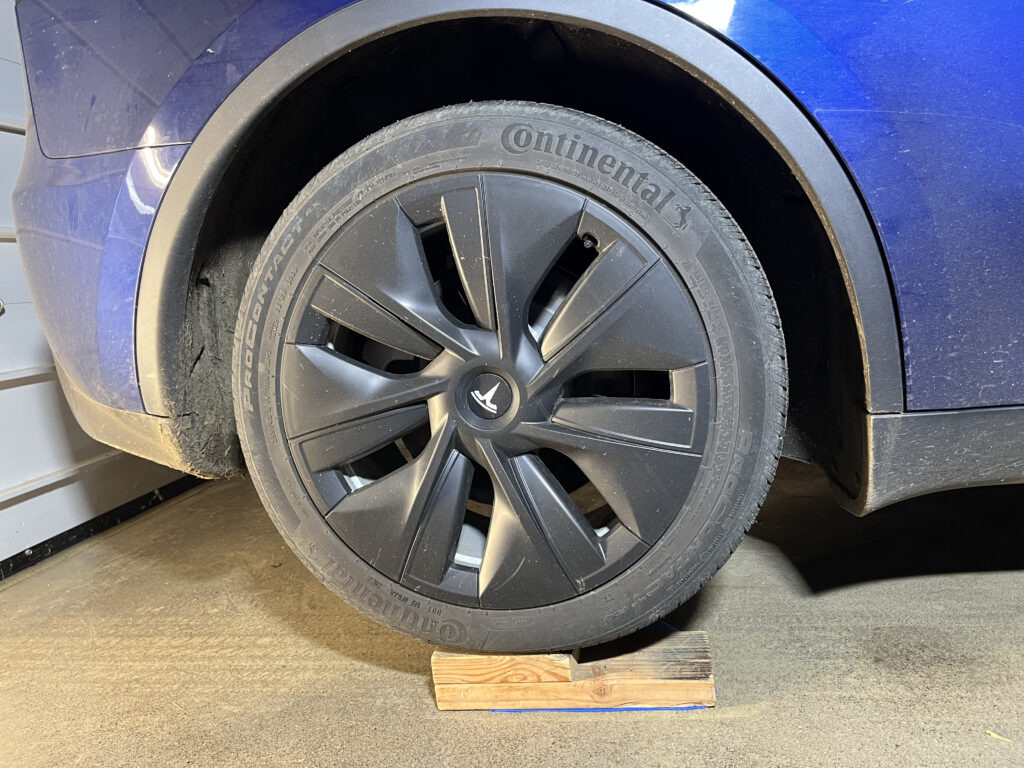
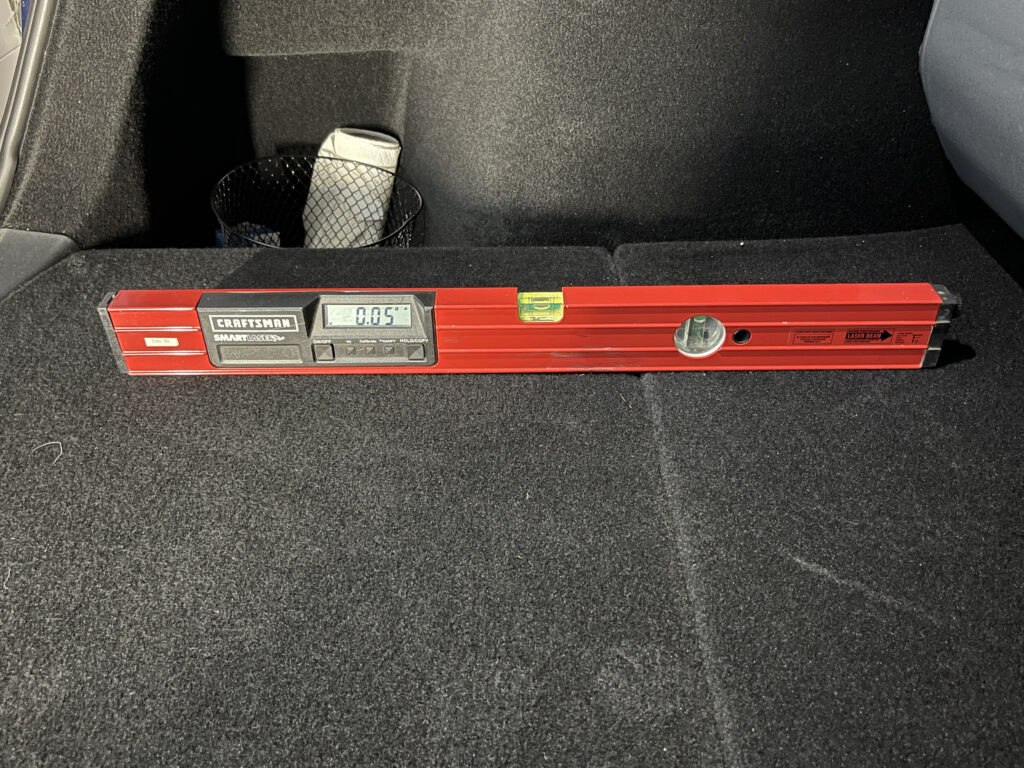
The first hinderance to a level and flat bed is the area in the back of the Model Y slopes down to the rear about 1.5 degrees when the car is parked on level ground. Leveling blocks easily fix this. If the campsite allows, I park with the front wheels a few inches lower than the rear. If not, I use the blocks to level the rear area.
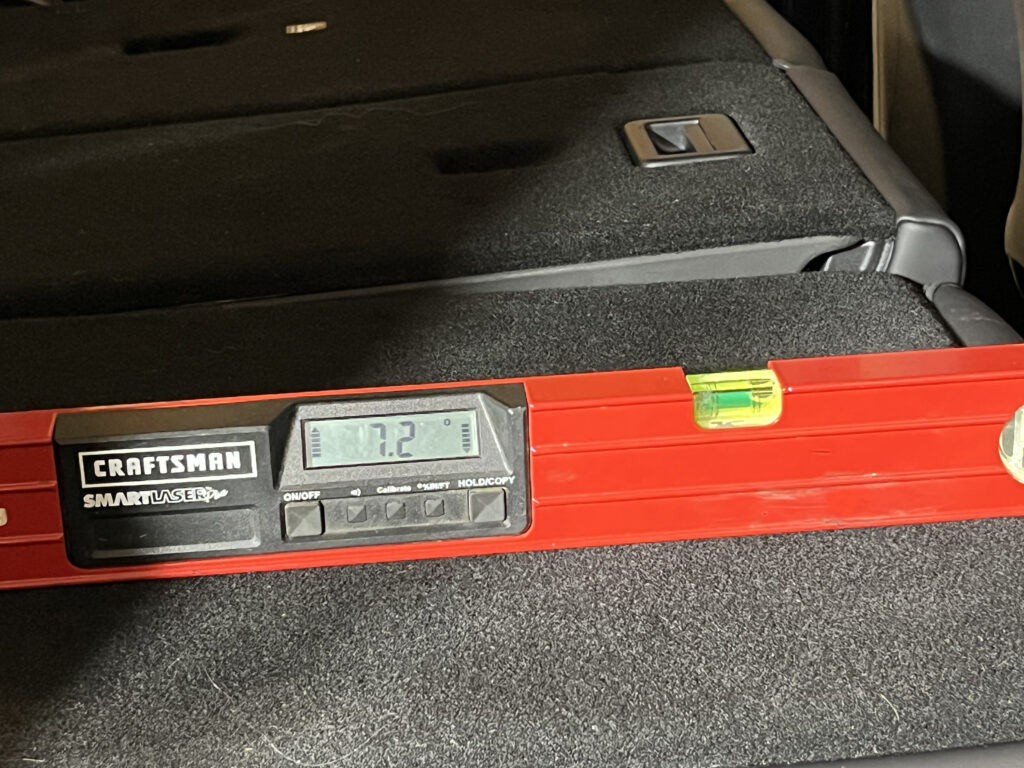
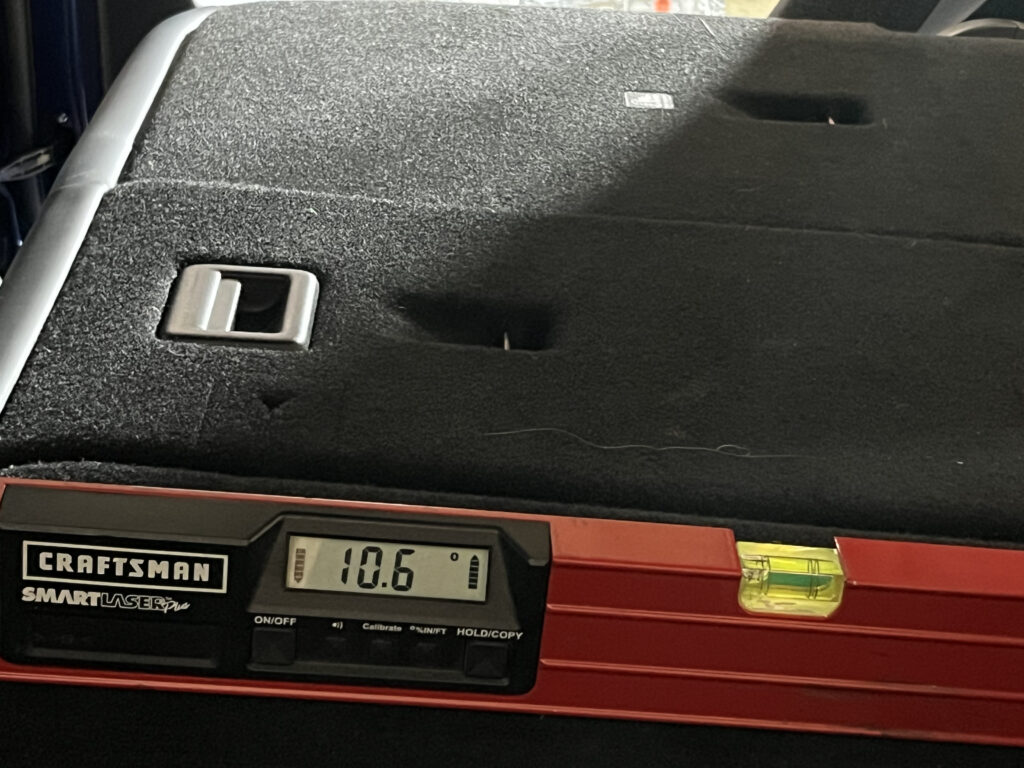
The bigger challenge regards the rear seat backs. They don’t fold flat. Mine hit a solid hinge stop at about 7 and 10 degrees from level. My old Model 3 was easier, I was able to cinch down the seat backs to become level as shown in this post. For the Model Y I needed to change what was stopping travel before I could do that.
By the way, it’s wonderful that Tesla has made the Service Manuals available for free. You’ll need to log in with your Tesla account and subscribe to the free annual access plan. Tesla Service Manuals They don’t show the hinge stops, but they do give good information on seat removal in section 1308. The hinges we need to modify are under the B-Covers.
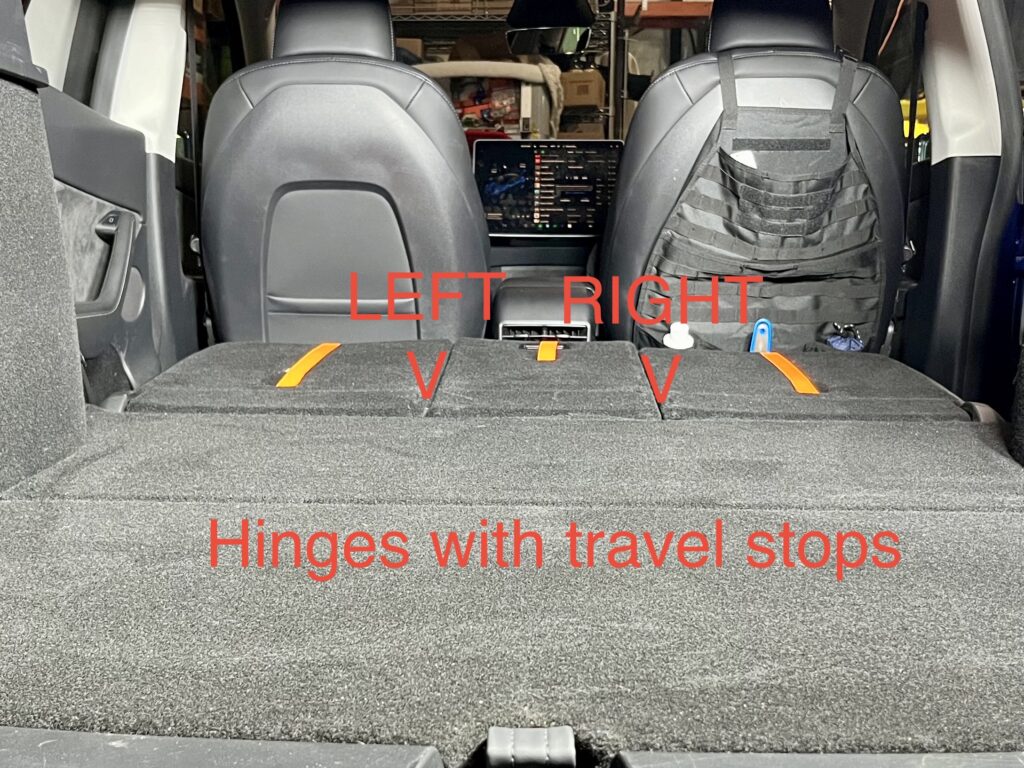
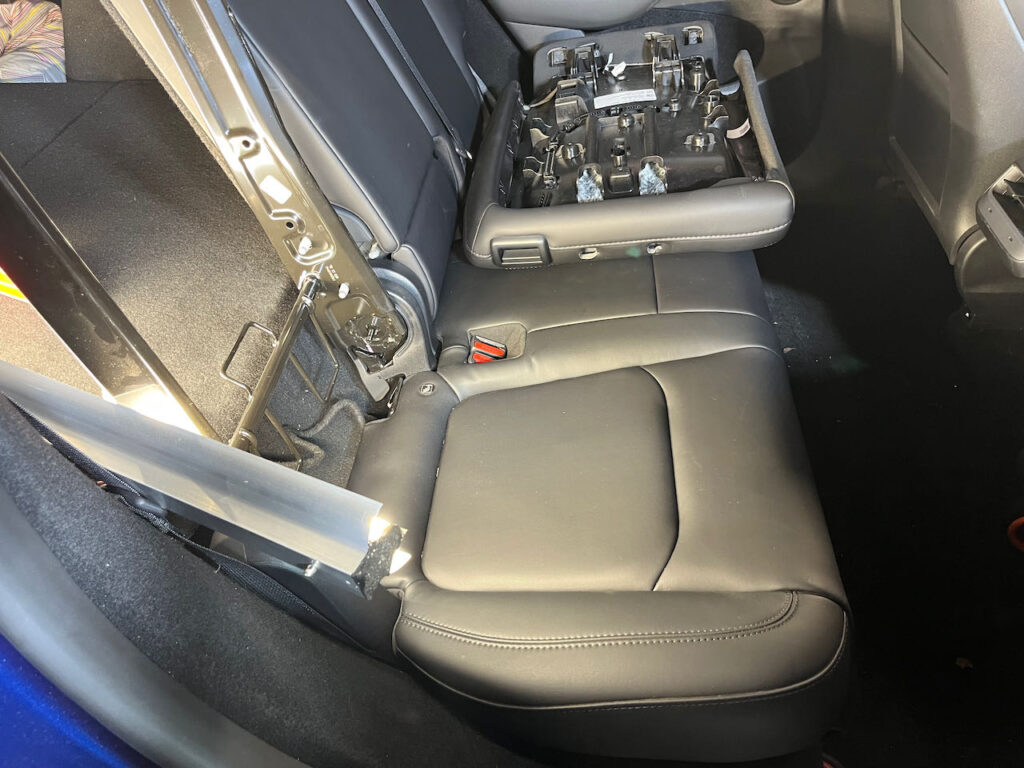
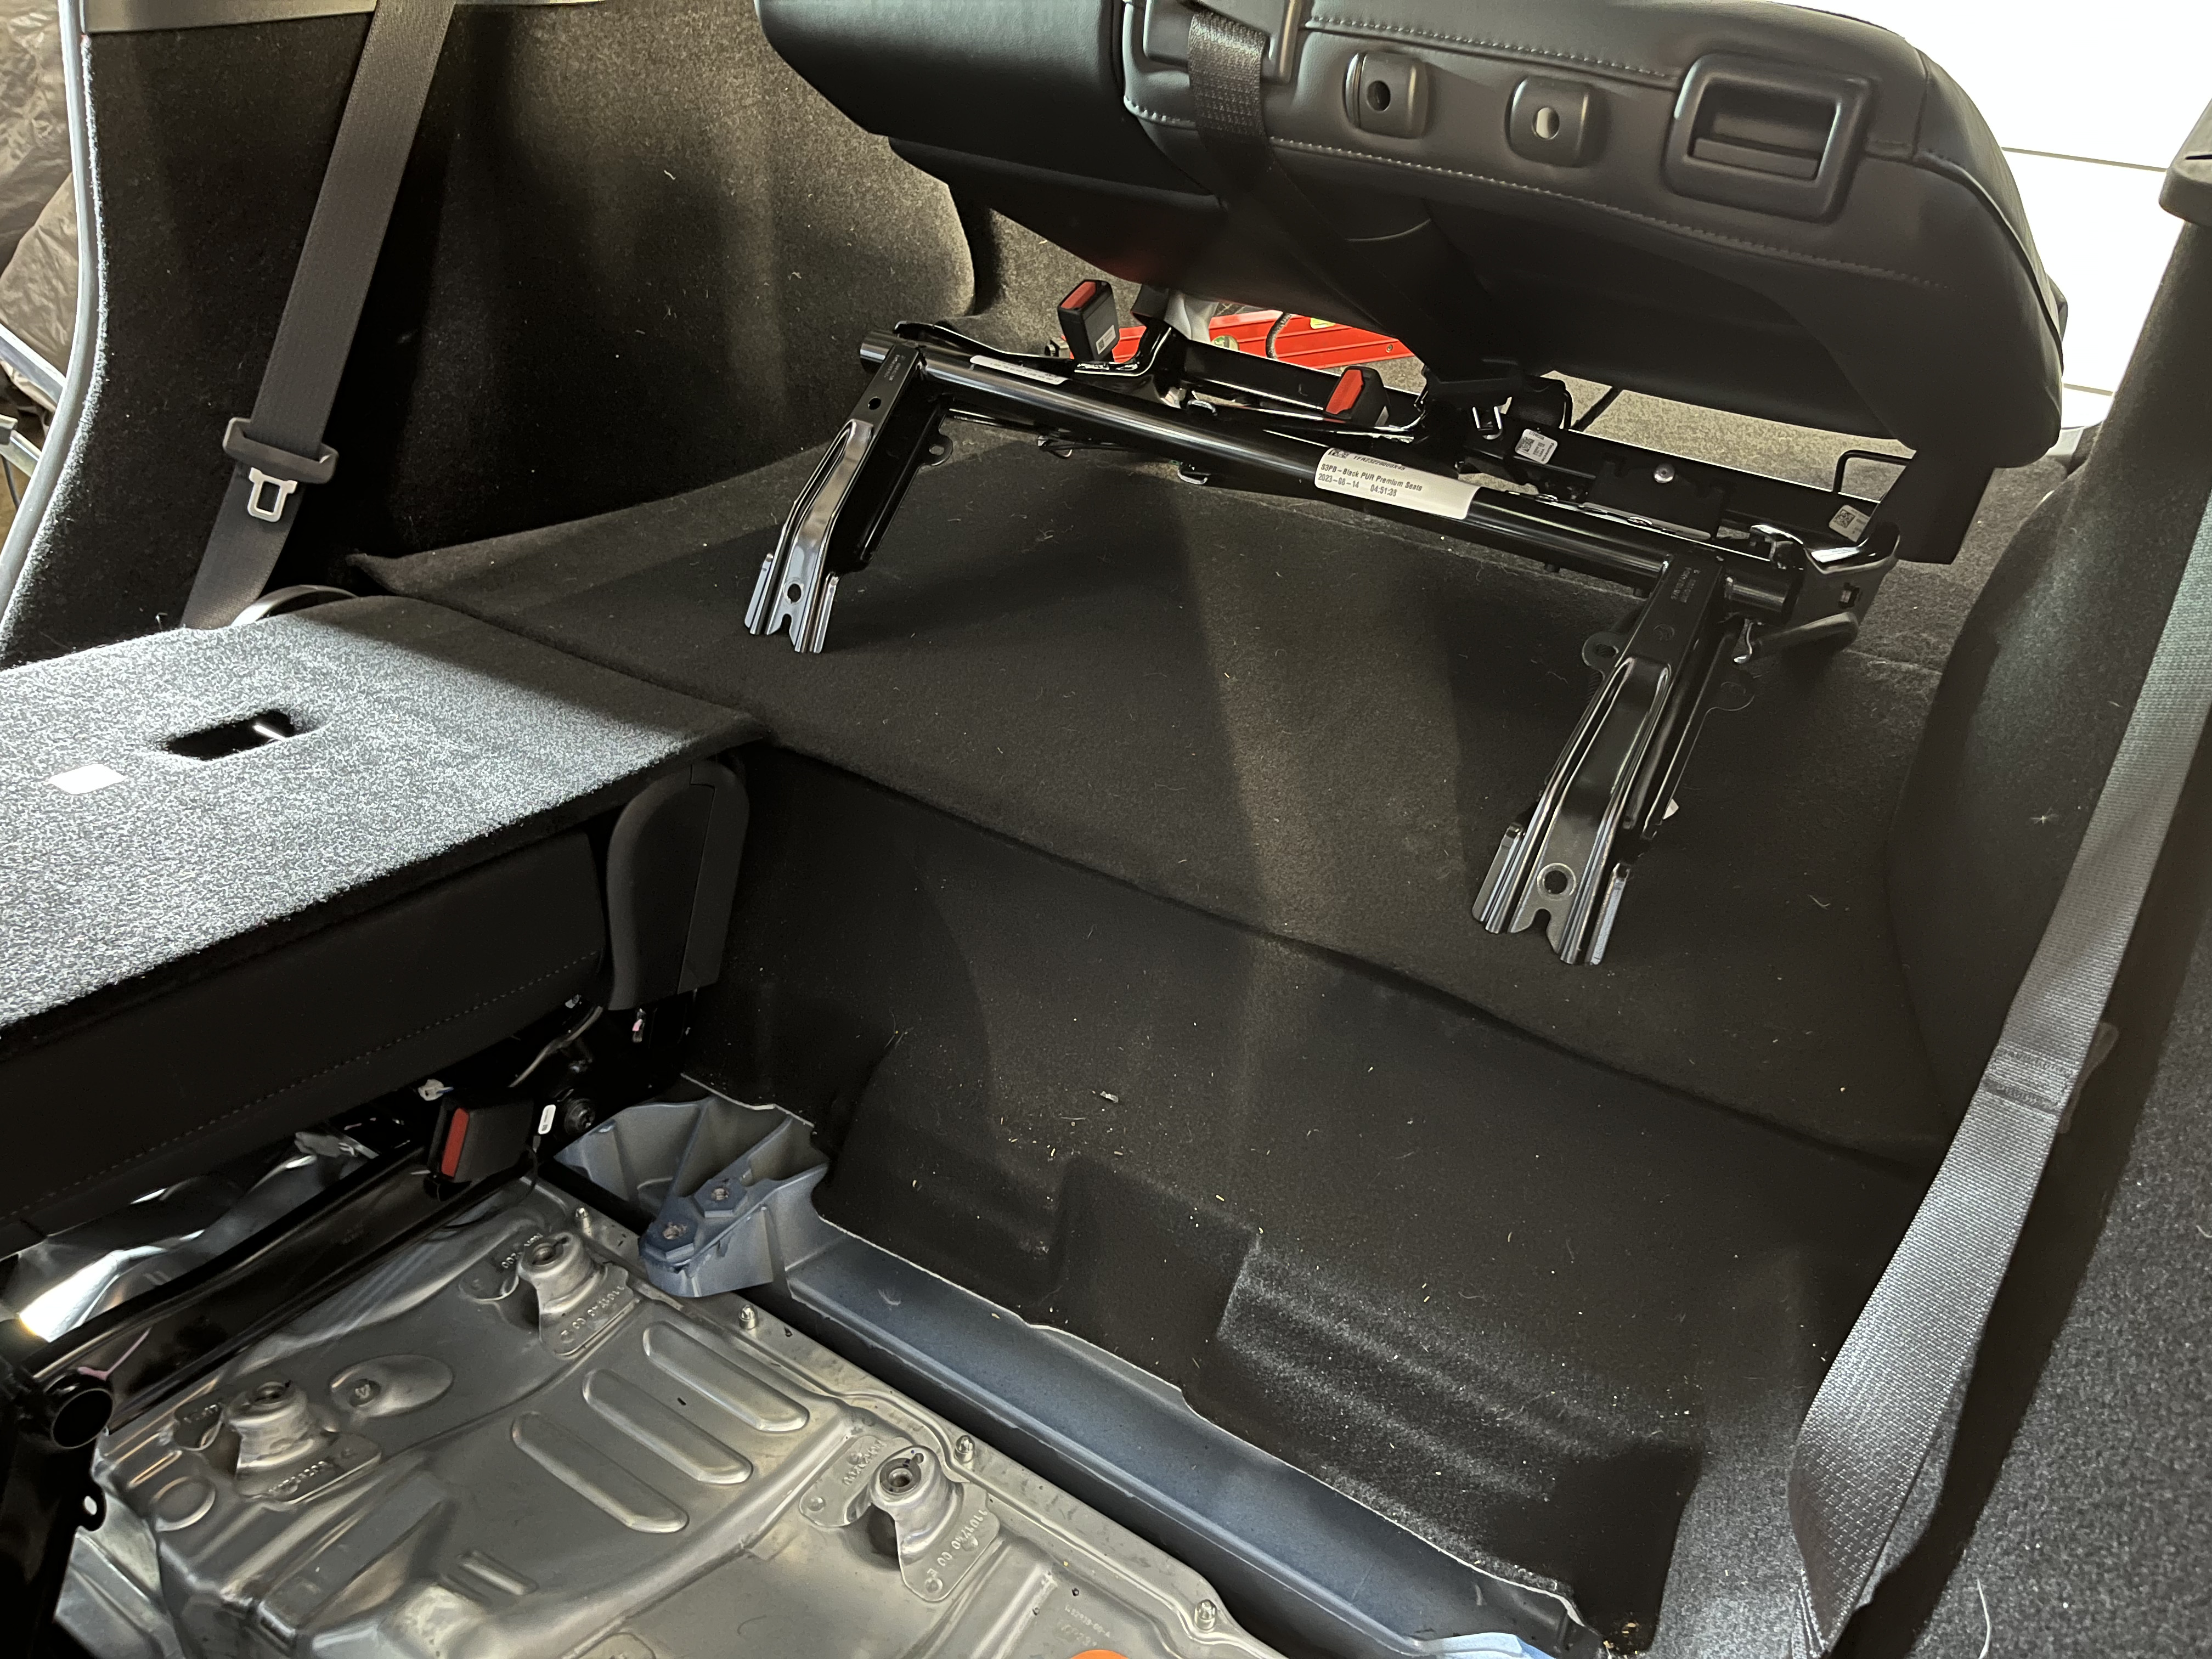
After removing the left side double seat I found that the hinge stops were located in the inner pivot points for the two larger sections as shown in the arrows in above image.
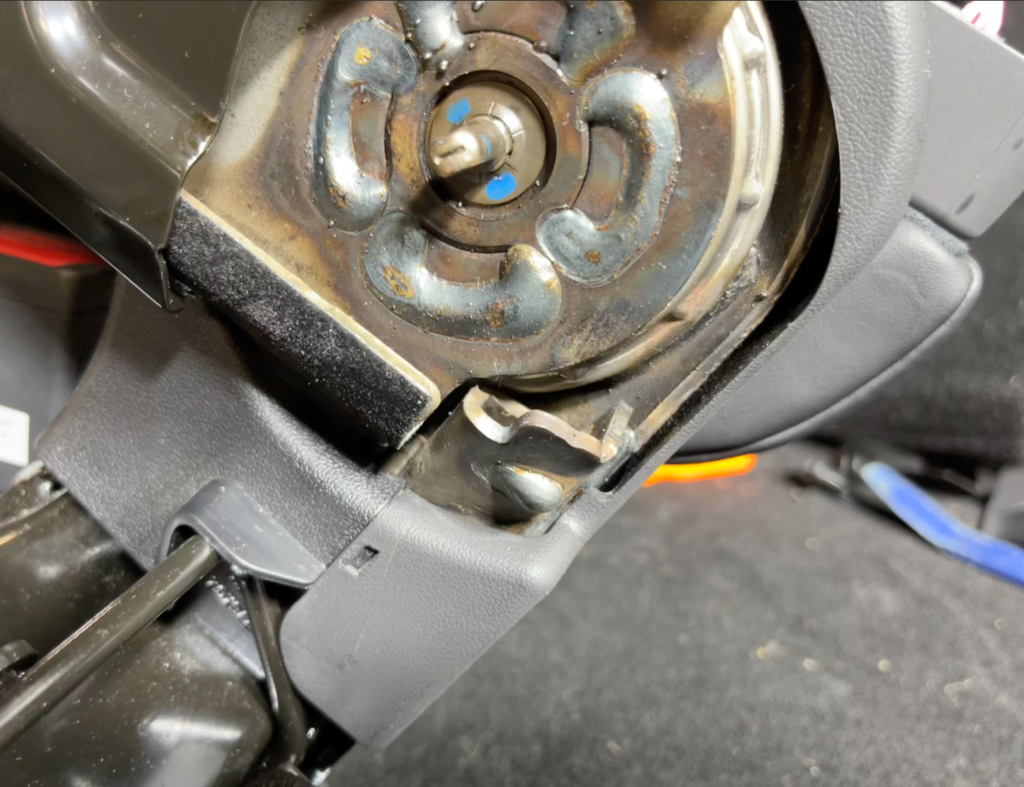
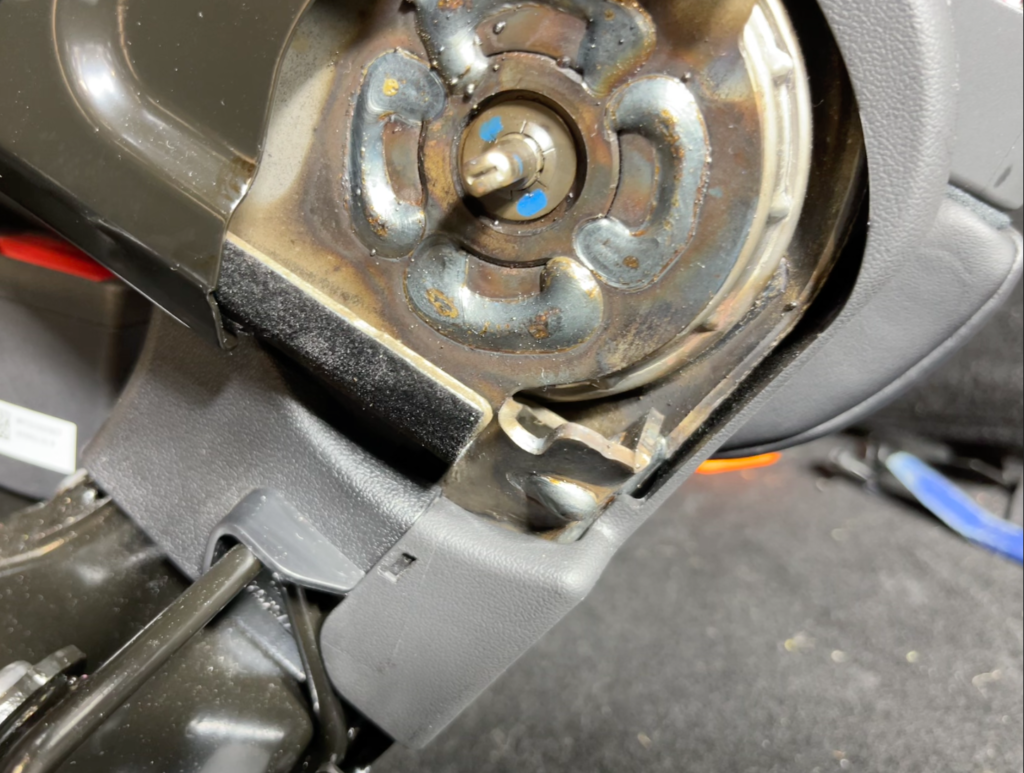
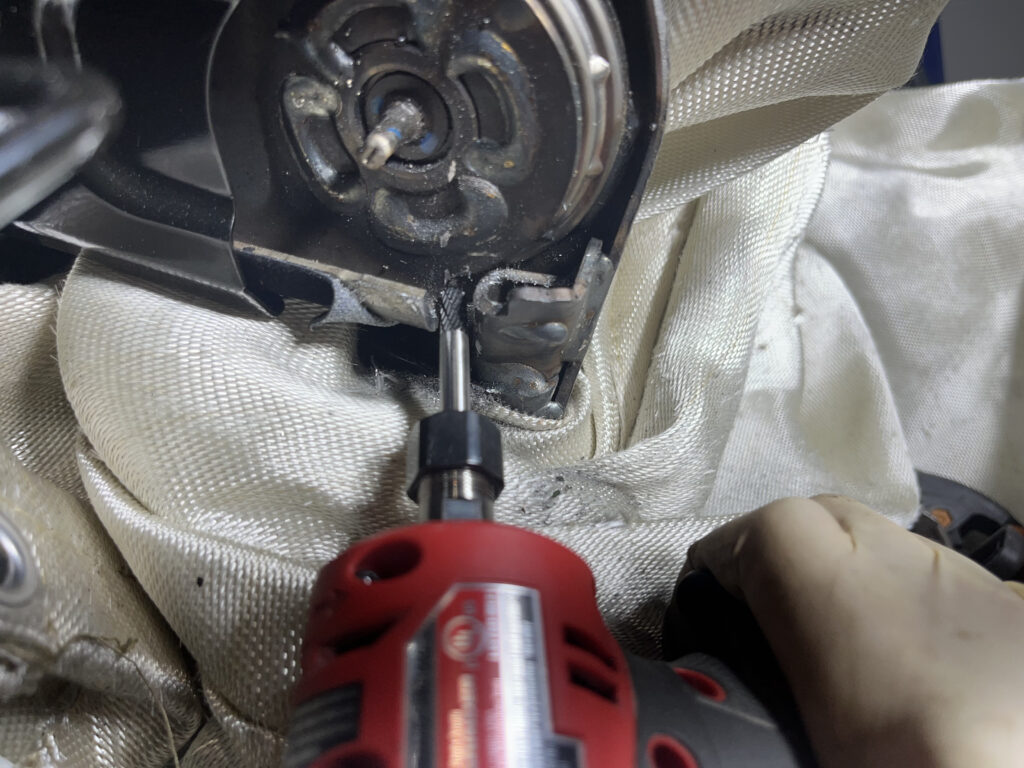
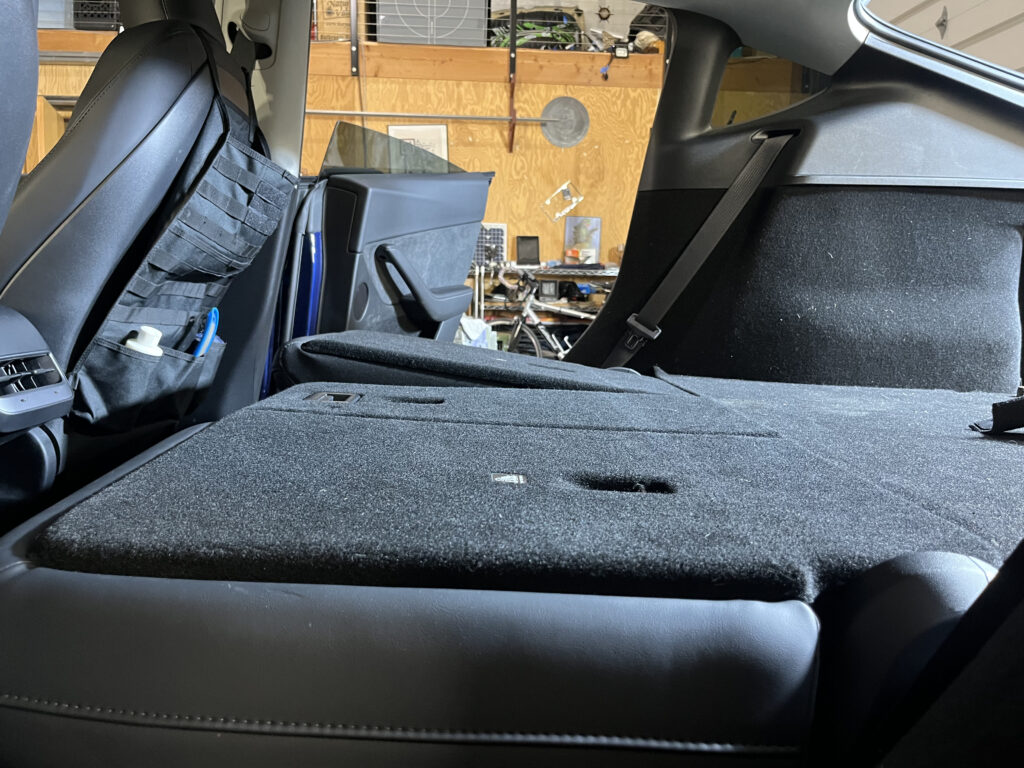
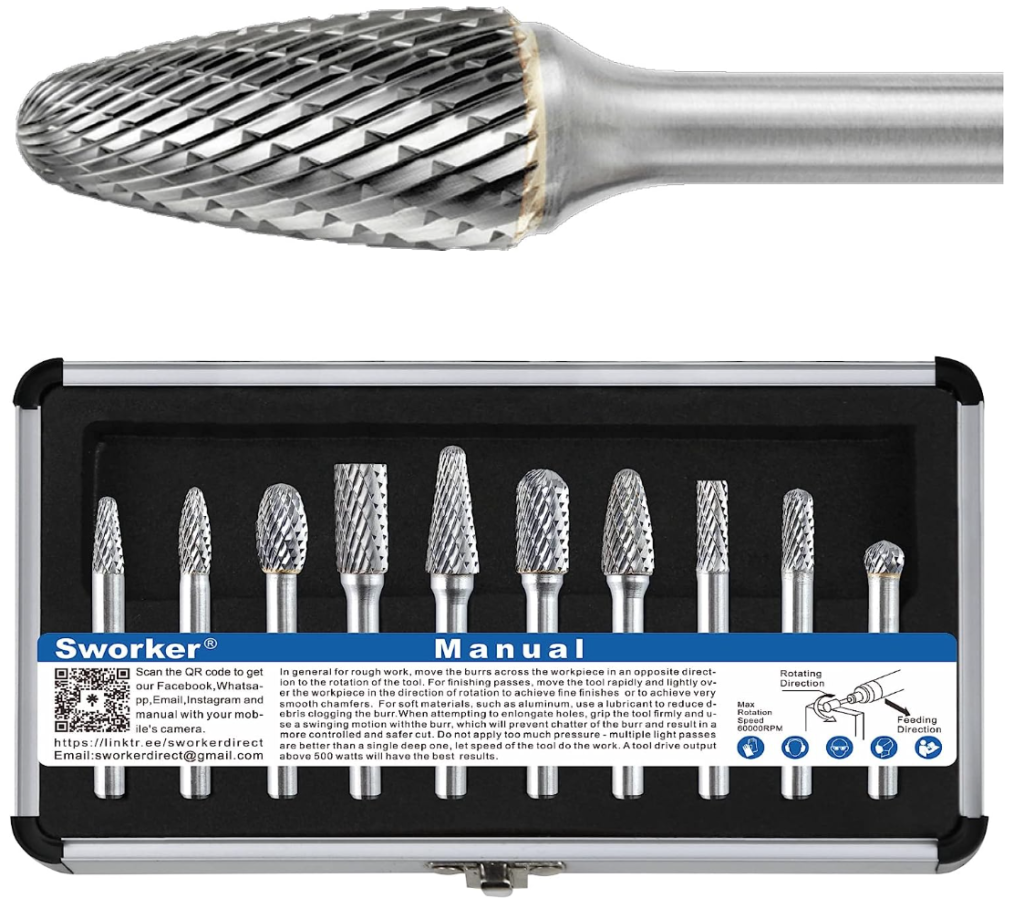
I did the left side first, removing the seat from the car and following most of the instructions under “Cover – Seat Back – 2nd Row – LH (5-Seat) (Remove and Replace).” I left all the seat belt mounts connected to avoid needing to replace those bolts – I see the manual now suggests that too. The above images show the exposed hinge with the stop open and closed. Also shown is the tool used to grind away the stop. I had to grind away about 7mm to 10mm of the frame before it would sit level. Having leveled the car before I started, I would incrementally grind more while checking level. The picture of it reassembled above is before replacing the seat bottom, so it sits flat with no force. Now that I see how much force it takes to hold the seats flat, I would not be concerned with grinding away a little extra.
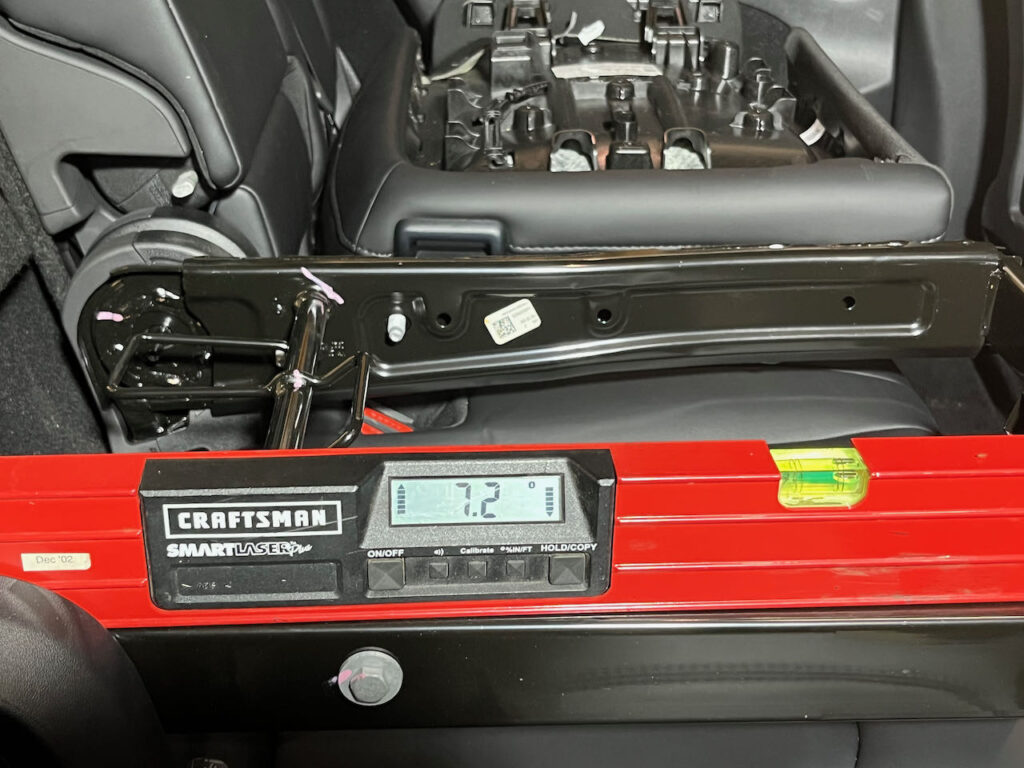
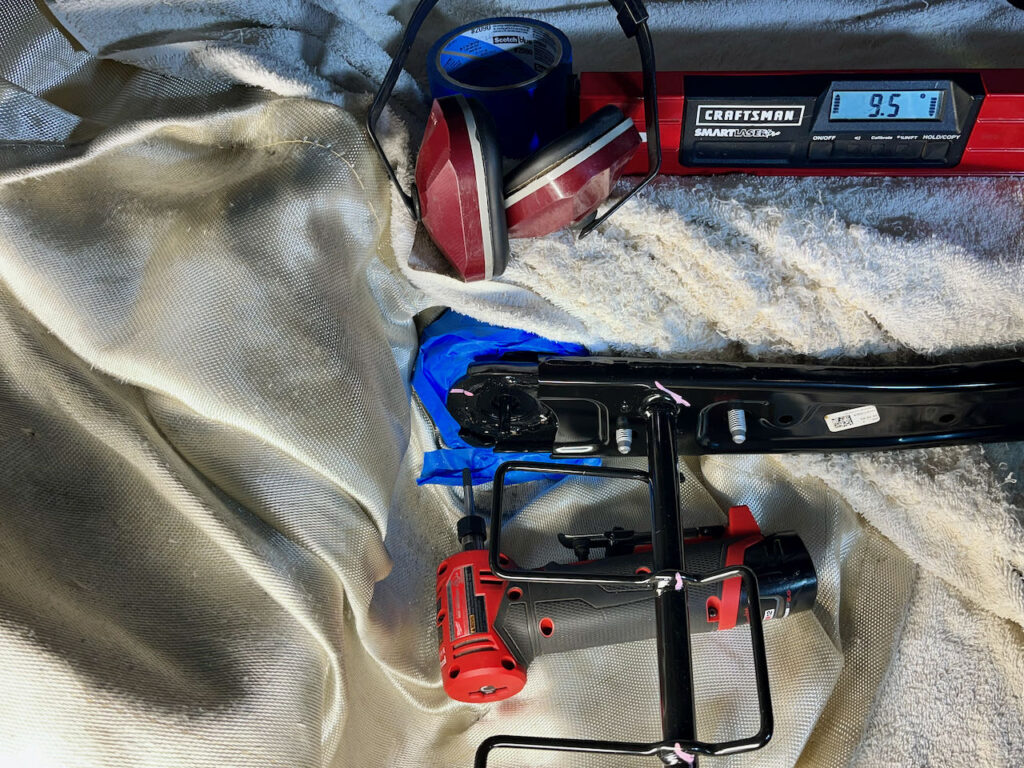
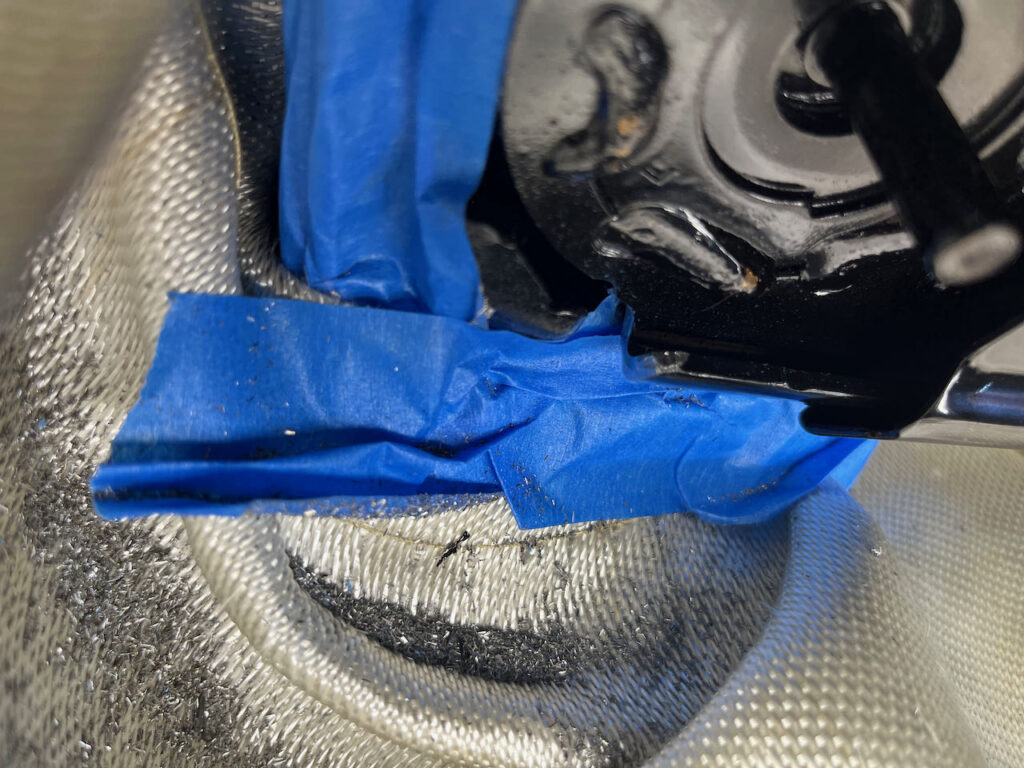
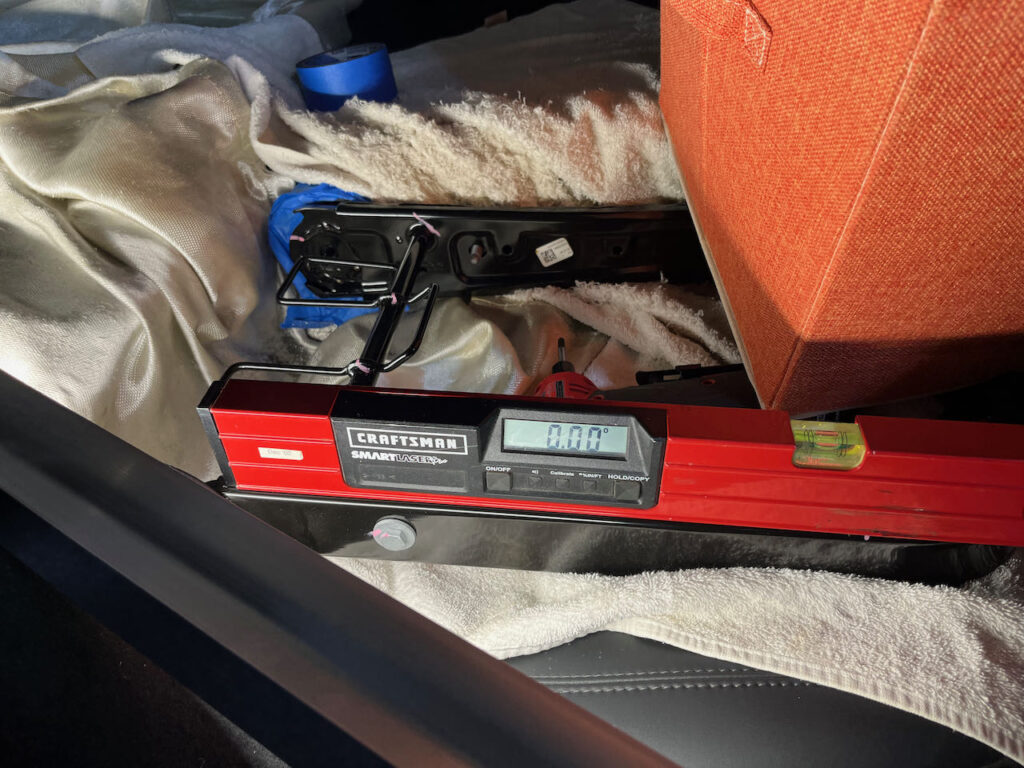
For the right side I simplified by doing the modification with the seat frame in place in the car. I skipped many of the steps in the manual, removing only the Back Panels and Seat Back Cover without removing the seat frame. I then masked the area and ground the seatback travel stop. The shavings go all over, so good drop cloths and taping are helpful.
I am now curious if the left side could also be done without removing the seat frame from the car. The left side has the added complication of being beside the center section, so it’s certainly different than the right side. If you try the mod without removing the seat frame, please let me know how it goes and I will update this page.
Straps
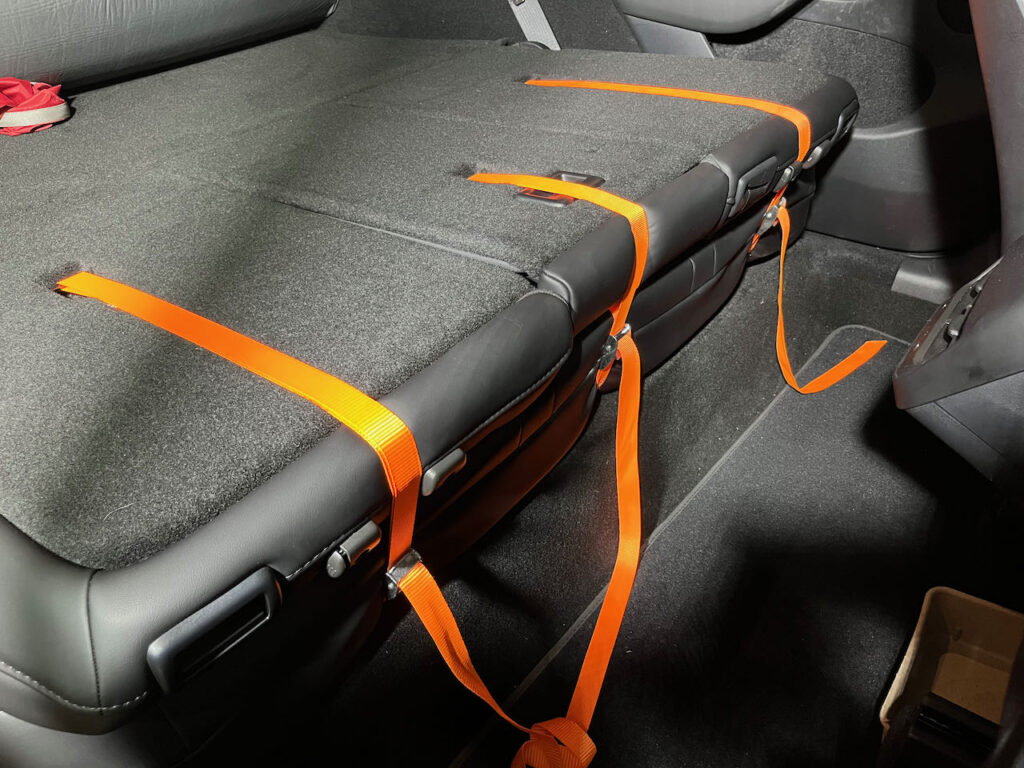
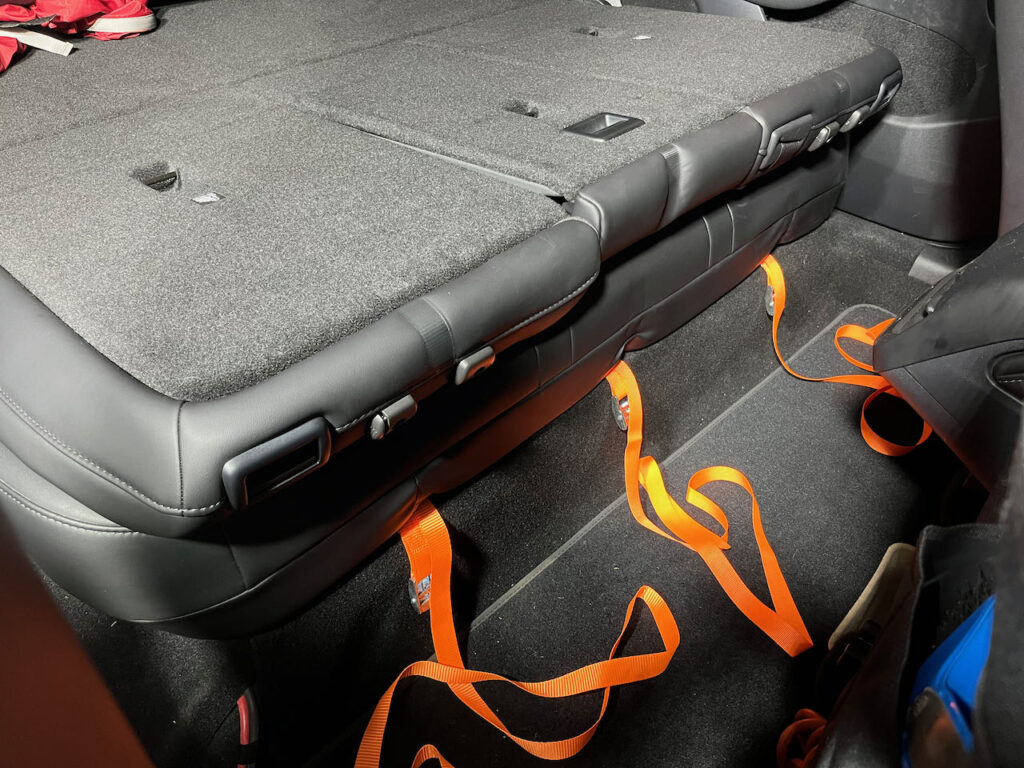
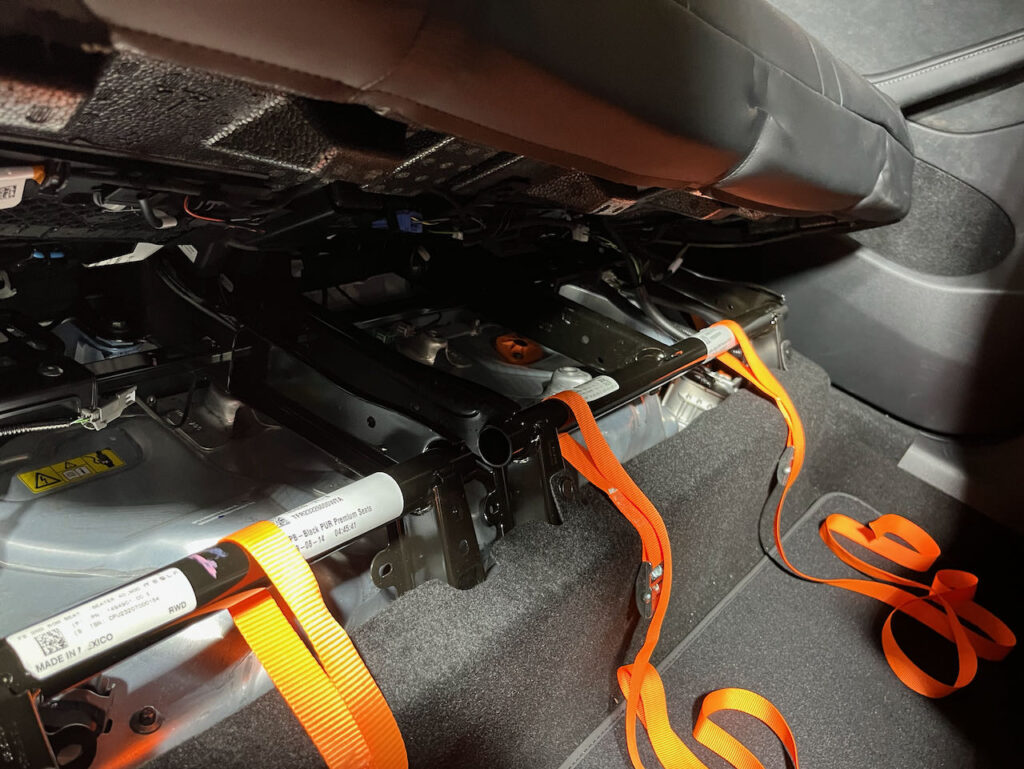
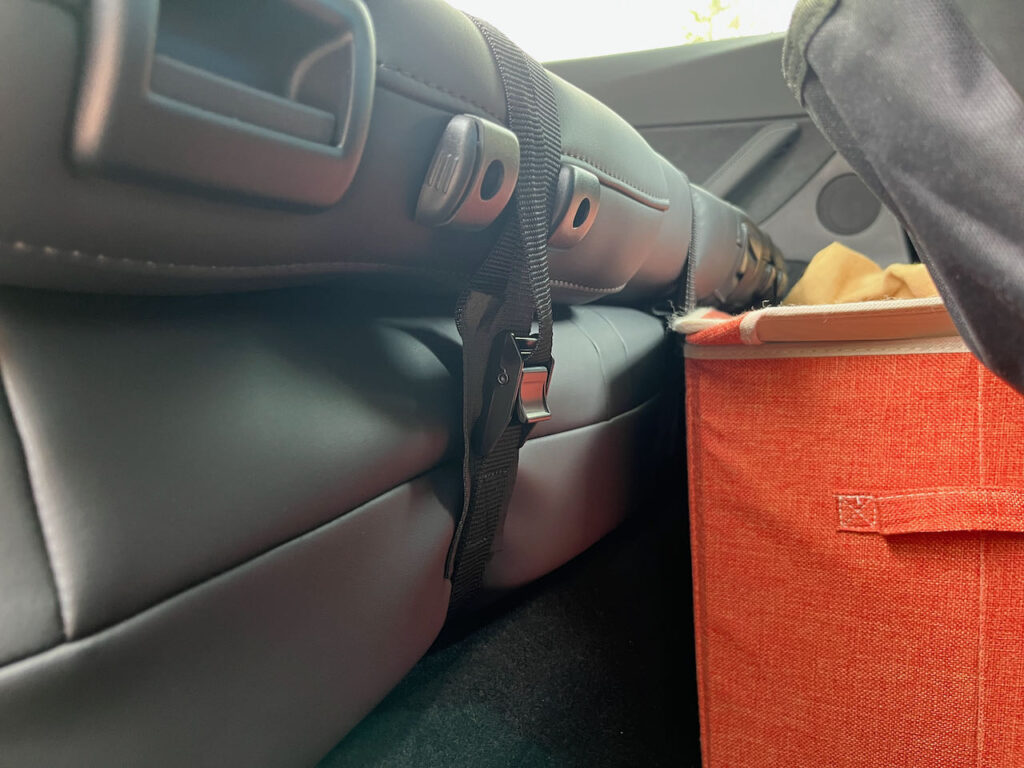
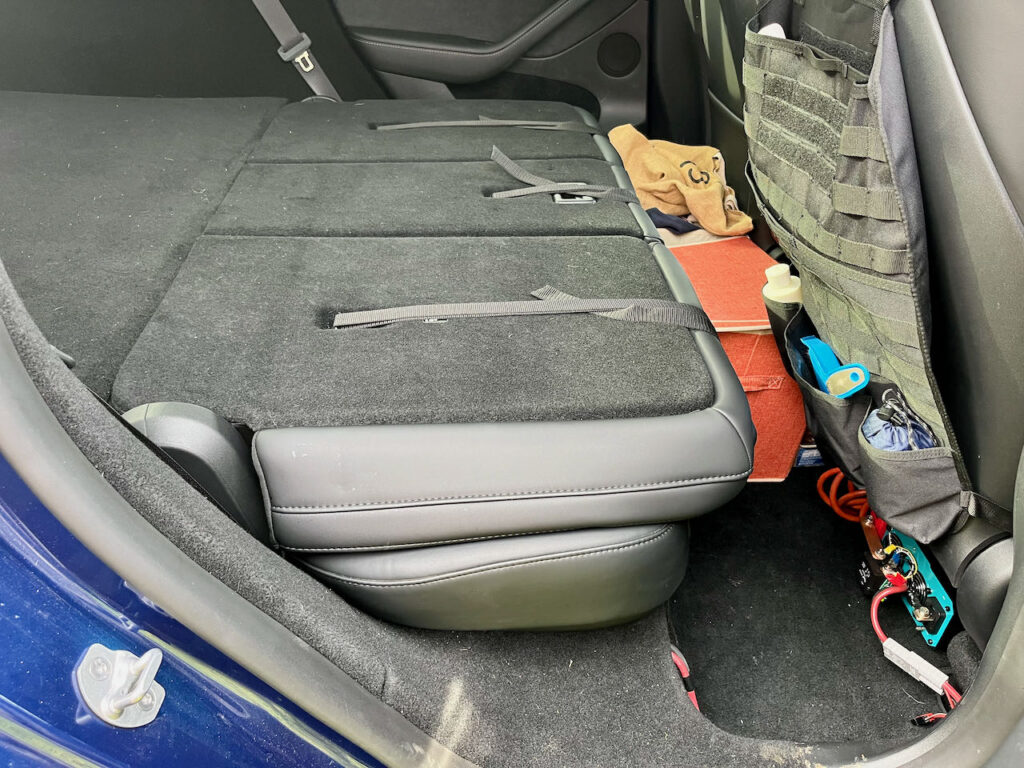
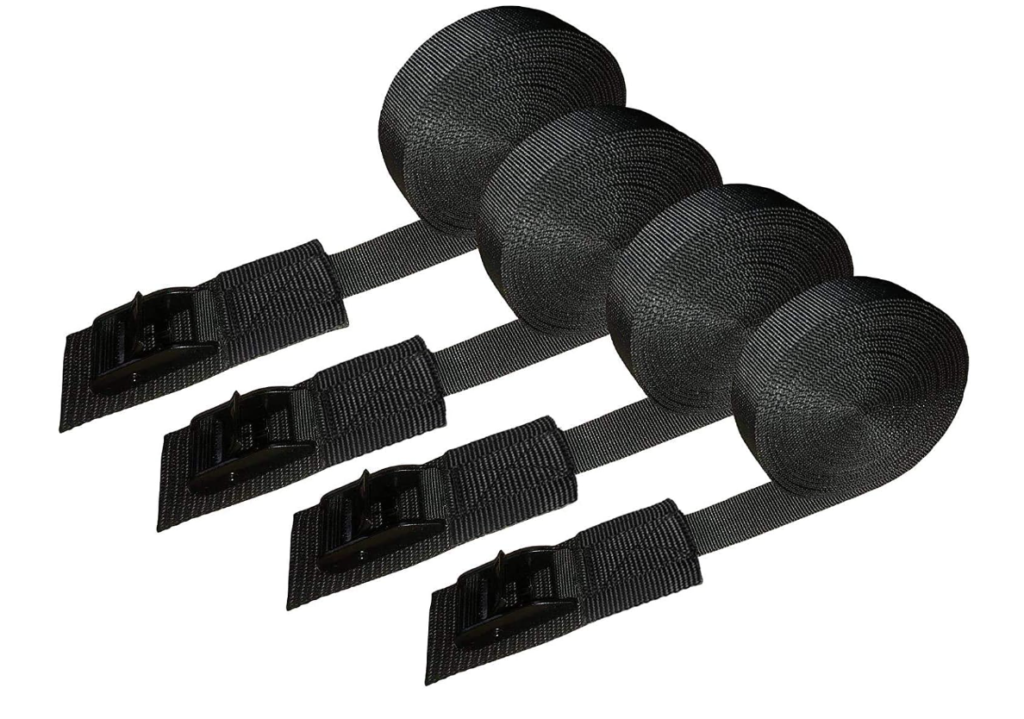
Once the hinges are modified, there are still the thick cushions keeping the seats from folding flat. It takes a good amount of force to compress the seats. Compression may have long term effects on the seats, I use the rear seats rarely enough that it would not bother me. The three lashing straps wrap around the steel tube supporting the seat base and through the child seat anchors to hold the seat backs flat. It’s helpful to kneel on the seat back while pulling them tight. Once you figure a good length the excess strap can be trimmed and sealed with a flame. I leave the seats folded and strapped during my camping trips unless I need to carry more people. For those cases I’ll release the straps and put the head restraints back. I later upgraded to the black straps from Amazon linked below. I find the buckles are higher quality and easier to use.
Images above show the orange Harbor Freight straps that I used being removed after several weeks of sitting compressed. The straps did leave some cosmetic indentations in the foam especially on the center backrest. They mostly recover after some time in the sun.
Supplies
Direct links are located below this image gallery.





Links to items I used in this post
- XPED Megamat Auto Mattress
- Twin Flannel Sheets
- Down Comforter
- Buckwheat Pillow
- VELCRO Straps 36in x 2in | 2 Count (I used 2 too make it longer)
- Auto Vacuum
- Seatback Organizer
- Carbide Burr Set
- Milwaukee M12 1/4 in. Right Angle Die Grinder
- Lashing Straps
I hope you found this helpful. Please leave questions or comments below, including corrections for my tipos.
This site contains paid links, by buying through these links I may receive a commission for the sale. This has no effect on the price for you.
Last update by Otmar on 1/5/2024
This is awesome. I wonder if this will work on my 2022 MY.
Also, have u considered increasing the compression area so the force on the cushion is greatly distributed and avoid leaving marks? I can imagine perhaps a strong enough material or thick but flexible plastic attached to the mounting points of your strap could work
I have not yet heard of any differences in the years, but I don’t know.
Spreading the strap load would be nice, if you find something that works well let us know!
Nice work. I’ve been figuring this was possible, but didn’t take the time to figure out it myself. I really don’t want to have straps compressing my seats, and I also don’t really need the seats to flatten to 0 degrees – ‘ I’m thinking 4-5 degrees would be enough to not have the bed feel awkward. So, question, without compressing the seats, how flat did they fold on their own? Also, BTW, I’ve heard your name in the EV community around here in “Cornvalley” quite a bit, for obvious reasons.
Thanks!
I don’t know offhand the angle without compression, sure it depends on what is on it. If you remove the seat botton, compression is not needed.
Are you aware of our local group? A good place to occasionally connect about EVs!
https://www.shiftev.com/pages/corvallis-albany-oregon-ev-enthusiast-group
I’m very interested in this! How are your seats faring after 6 months since the mod? Would you be open to creating a video of the best process to reveal the hinges and how much material you found ideal to remove?
Hi Mark,
The seats are holding up fine. Despite sometimes leaving them compacted in bed mode for weeks at a time, I see no signs of creasing or damage. The most stress is where the strap goes over the backrest, and that shows no impressions yet.
I’ll keep your suggestion in mind if I ever am involved in doing the process again. I seem to recall I removed between 8 and 10mm of metal to get the angle correct. Now that I’ve used it a lot, I see that you would not notice if you removed a bit too much since the seats require so much force to compress the cushions.
Thanks for the guide! I wanted to clarify some steps, the location to grind is marked by the red arrows correct? Is it on the inside or outside? When working on the 60% side, did you remove the center section to access the hinges or the full seat back section?
I’m glad you appreciate the guide.
Yes, the arrows indicate the hinges with stops that need grinding. It is the inside hinge of both larger sections.
On the 60% side I unbolted the whole 60% seat assembly from the car (would try not to next time) and removed the back covers, but I left both seat backs connected to the structure and hinges. Does that answer what you were wondering?
Yes I believe so. I have the seat out and I’m just trying to get the center latch removed from the back. I’ve ordered some trim removal tools to assist as it seems really stuck in there.
Really appreciate the level of detail you’ve provided! I just have one question–if you remove the rear seat bench/cushion is the strap compression force reduced or perhaps no longer required to keep the seatbacks flat? Once performing your modifications to the seatback travel stops, I was thinking I could move the bench/cushion to the second row foot-well area to allow the seatbacks to lay flat without the compression straps.
Thanks!
And yes, your guess is correct. If you modify the stops and remove the rear lower cushion, straps are no longer required to keep the bed flat.
Otmar: This is great stuff. You nailed it. I was searching for exactly this info. Wedges and platforms are great, but this fix gets right in there to solve the actual problem. Thank you for sharing! I have three questions for you. 1) Can you share a “before and after” (without the die grinder in the way) photo of the cut? 2) Do you think a Dremel tool with the right cutter would work… instead of a die grinder? 3) Does modifying the stop only affect the folded/closed position… or does it also affect the back/open position?
Thanks Jason!
1) Afraid I didn’t plan well enough for that.
2) With time, yes. Area removed is about 10mm x 8mm by 4mm thick.
3) Yes, it only affects the lowered position and doesn’t seem to contribute to structural strength in any way.
Otmar: you are a braver man than I am! I got pretty deep into it. I got the entire left hand seat out! But I ran into issues with getting the LH seat back (carpeted panel) off. The instructions from Tesla linked to the RH seat back instead of the LH, and it seems like something was different–a small metal clip/strap in the upper corner would not come loose. And then I looked at the seat belt bolt, and it’s a giant torx head, and I didn’t have that handy, so that’s when I called it quits. If it wasn’t 86 degrees, I might have soldiered ahead. So… it’s wedges of foam for me!
So close! Good try.
I didn’t remove the seat belt bolts. They were listed as one time use and I didn’t want to risk anything there. I propped the assembly inside the car so I had room to work on it without removing them. A bit messy, but worked for me that time.
[Edit] Actually it looks like I didn’t have to remove the belt to release the seat assembly, but I somehow got access while leaving the rear cover connected to the belt.
Hi, thank you for the guide this has helped me a lot! I’m currently designing a platform bed, where I completely remove the rear seats. It may be a bit extra, but it would open up a lot of space to store my skis under the bed, and easily access all the below-floor storage. I’ll be sure to make a blog post myself when all done. Maybe I’ll just post on this website, although I’m new here.
I had one question for you. Are you sure your garage is level? I took a 3D scan of the inside of my car, and from that the rear floor looks like ~2.5 degrees, not 1.5 degrees. Many garages have a 1-2 degree slope, so I wonder if you took that into account.
Thanks!
Hi Curtis,
That’s great that you are doing a more in depth mod. There certainly is a lot more space if the rear seats are not needed. I’ve seen others do similar, maybe on YouTube, but I figure you’ve seen those.
Yes, my garage is unusually level. Since I work on EVs I designed it for testing rolling resitance and made it very flat. There are a slight bumps at the concrete expansion joints but it’s pretty level. Maybe your vehicle is different than mine.
This blog is only for my projects’ but if you document your build on one of the many forums or YouTube I’d love to have a link here for others to find it.