Yes, It’s really been more than two years since I’ve posted here. It seems that the effort to make a pretty post here (often with a video) isn’t happening. When I have the energy, I’d rather put it toward the project directly.
Good News! The new Orly Blue Stretch is making great progress again, and I have a LRAWD Model 3 to put under it.
I’ve set up a new Twitter account where I hope to post many quick and easy updates. Please follow the project there and hopefully I’ll be more diligent at keeping you all in the loop.
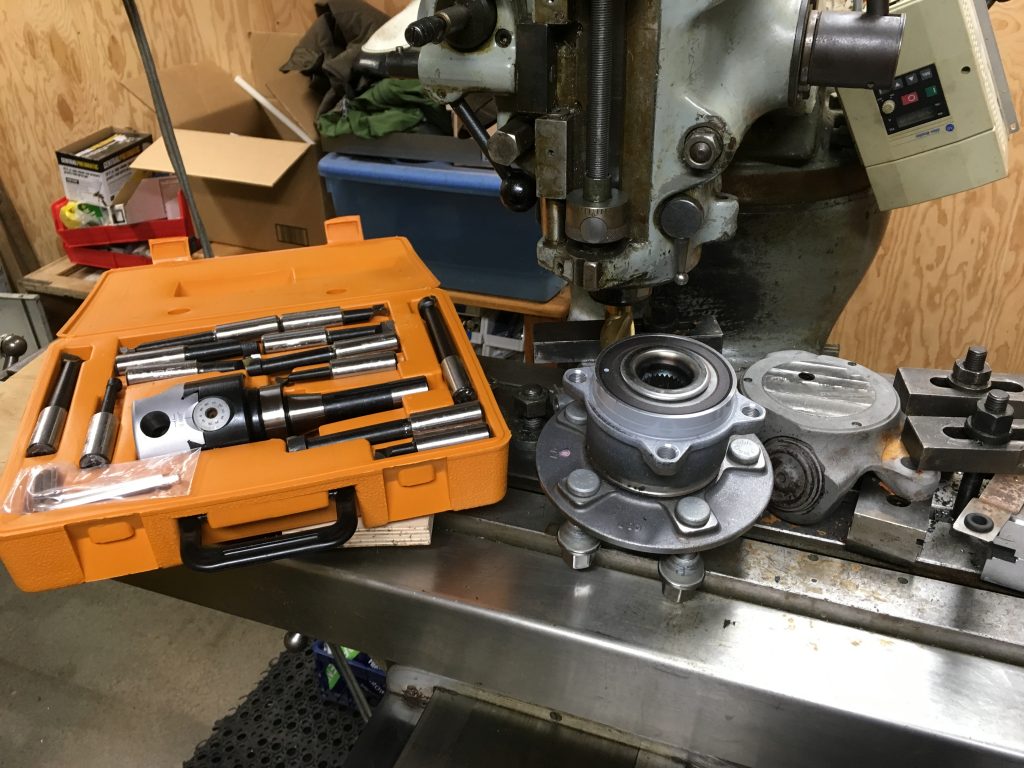
Weeks of staring at the partially modified VW front spindle and its need for a large clearance hole to fit the Tesla bearing had me feeling a bit stuck. Fortunately a friend who is a master machinist happened to stop by. “An adjustable boring bar is the tool for you,” he advised. I had seen these odd looking things before without really understanding what they were for, now enlightened this tool seems like a great investment. Buying new tools is always a satisfying experience.
This should help get things moving again, one step at a time.
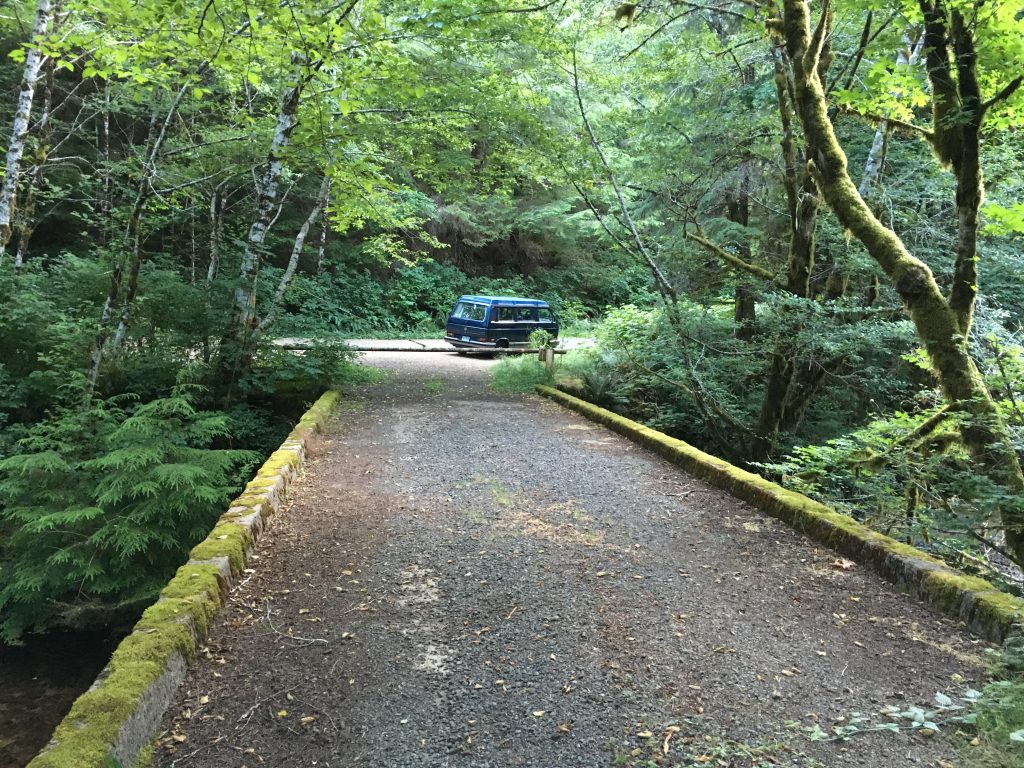
Meanwhile, the still-gas-powered donor Multivan would like an engine evaluation before I disassemble it since my other camper, the temporary one, has been making upper rod bearing noises for years. The Multivan’s freshly rebuilt engine was said to be burning oil but had synthetic oil during the break in period. So I’ve changed to regular oil, did some maintenance on it and am using it to explore Oregon waterfalls. Hopefully it will still break in properly so the ICE can see a continued useful life in the other camper.
A simple video update where I explore wheel clearance, hub adaptor fit with brakes and axle shaft clearance for the TesFalia using my parts van as a fitting platform.
Executive summary: Underground support for Salvage cars is helping make up for Tesla’s continuing unusual policies. The Stretchla project is out to pasture, I still plan to build a Tesla powered VW Vanagon camper, it may be regular “short” length. I found a perfect conversion candidate.
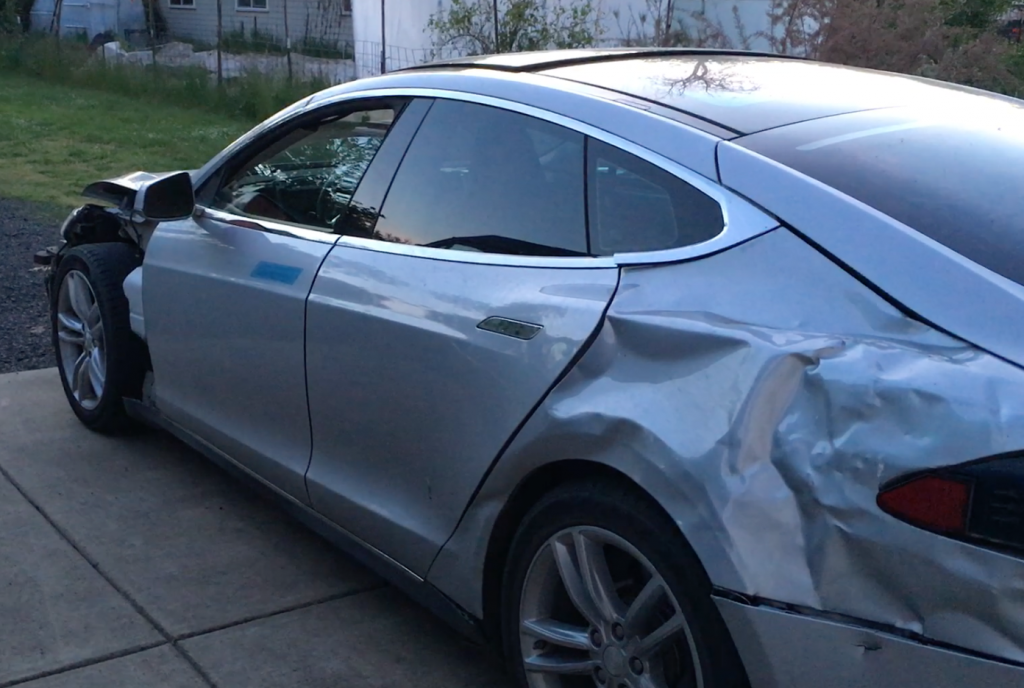
In my last post long ago I spoke about Tesla’s non-industry-standard and unusual (I might say draconian) lack of support with regard to parts sales and providing service data for owners wanting to do their own work, especially for owners of vehicles with salvage titles. We seem to be of a lower caste in the service department. That has not changed much in the intervening three years, though there is rumor that Tesla service is working on improving the situation. Meanwhile the abundance of wrecked Teslas have made a robust used parts market and a few brilliant technical explorers have made it possible to root the main computers to get diagnostic data, remote access and modify functions as needed. It’s complicated and tedious, but possible. I’ve been driving the Wreckla on local trips for years now, and other than the malfunctioning door handle (which I removed) it has been reliable. Early door handles like mine are a known issue and would have been replaced under warranty if the car was not salvage titled. Meanwhile, it still has bent and missing parts with the air bags disabled. I haven’t tried to fix it up any more since I keep hoping I’ll move the guts over to a VW camper.
There has been relatively little progress on the Stretchla since the last update. The project suffered from extreme “scope creep.” I could think of so many cool things to do that the project became an overwhelming fantasy. Most importantly, I neglected my own advice for people who want to convert a gas car into an EV. That advice is this: If you want to do a conversion, pick a nice clean car and convert it. If you additionally try to restore a car at the same time you will soon discover that car restoration is much more work than an EV Conversion. This is exactly what happened with the Stretch. The more I took it apart, the more I wanted to fix the rust, replace side panels, paint it inside and out. I even figured it was wise to shorten it by a foot to better fit the battery underneath. I wanted a nice restored body, but it turns out I was not motivated to do (or hire someone to do) the work required. In the end I chose not to climb that mountain.
Like many humans, I tend to get fixated on my own view of how things are best done, and those ideas change over time. For instance when I started the project I was very attached to using the Tesla air suspension, while today I’m thinking it may be better (especially easier) to use the Vanagon suspension with Tesla parts from the wheel hub outwards. The battery also was a big scary block that I wanted to retain unmodified. It is still big and a bit scary, people have burned several shops due to unsafe practices, yet my confidence with reconfiguring it in a safe manner is growing. This puts new layout options on the table, such as using an un-stretched VW camper for the base vehicle. I still love a Stretch Vanagon for the extra space, and maybe that will happen in the end, but I could test a short Vanagon running with the battery behind it on a trailer before I make the final choice on that.
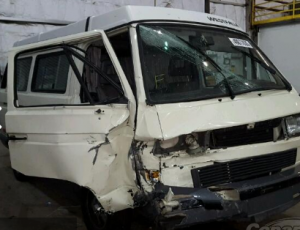
With the Stretch out to pasture, my next plan was to buy two fresh used donor vehicles (of the same color this time!) to make a Stretch that didn’t need extensive body work. For months I searched the auction sites until the perfect back half came up. A 1990 weekender with a pop top that was badly crashed in the front.
When the auction went live I almost won it for about $5500 before the bidding software gave it “bonus time.” I gave up when bidding hit $7500. I like to be open to messages from the universe. I figured this one would sell for $3-4K, bidding at twice that seemed like a pretty clear message from the universe that I would not enjoy following that Stretchla path.
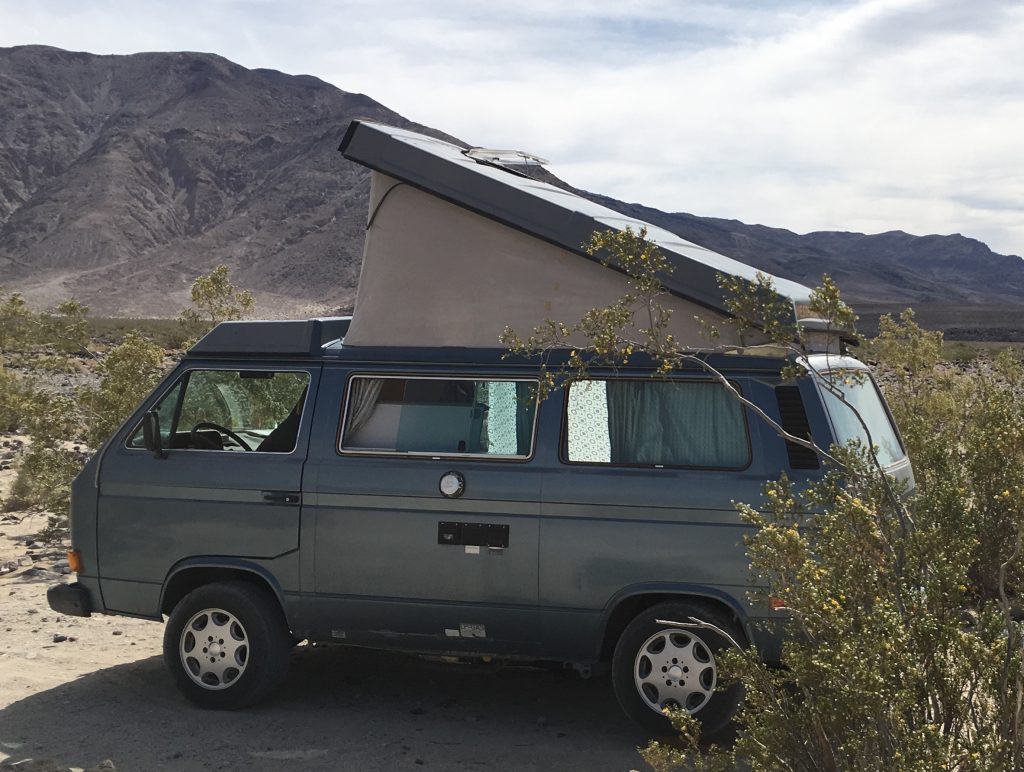
Although I appreciate such mysterious guidance (especially in retrospect when so often something better comes along) it did again leave me lost and unmotivated for a while. My thoughts then pivoted to finding an okay looking, low cost – low risk standard length “Tin top” Vanagon to test fit the drive system since the pop tops have become very popular and therefore expensive. I figured that once the conversion was proven in a lower risk donor I could move it to a camper that I wanted. Maybe even my “Ersatz” camper shown in the desert below would do for the final unit, but that one also has issues with seam rust that want care, so maybe not.
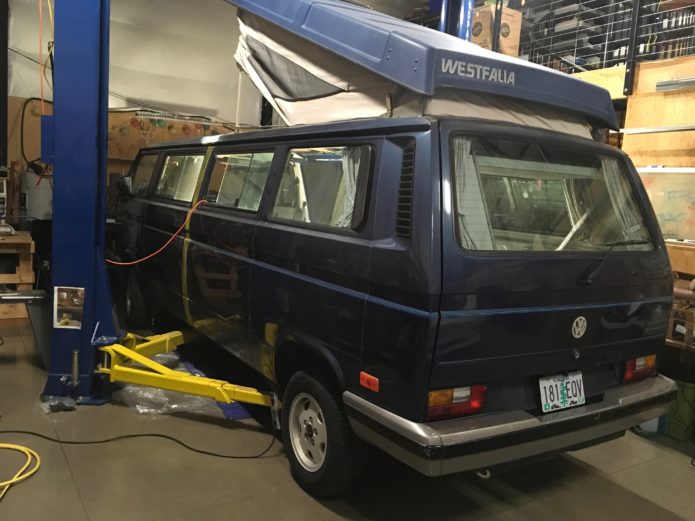
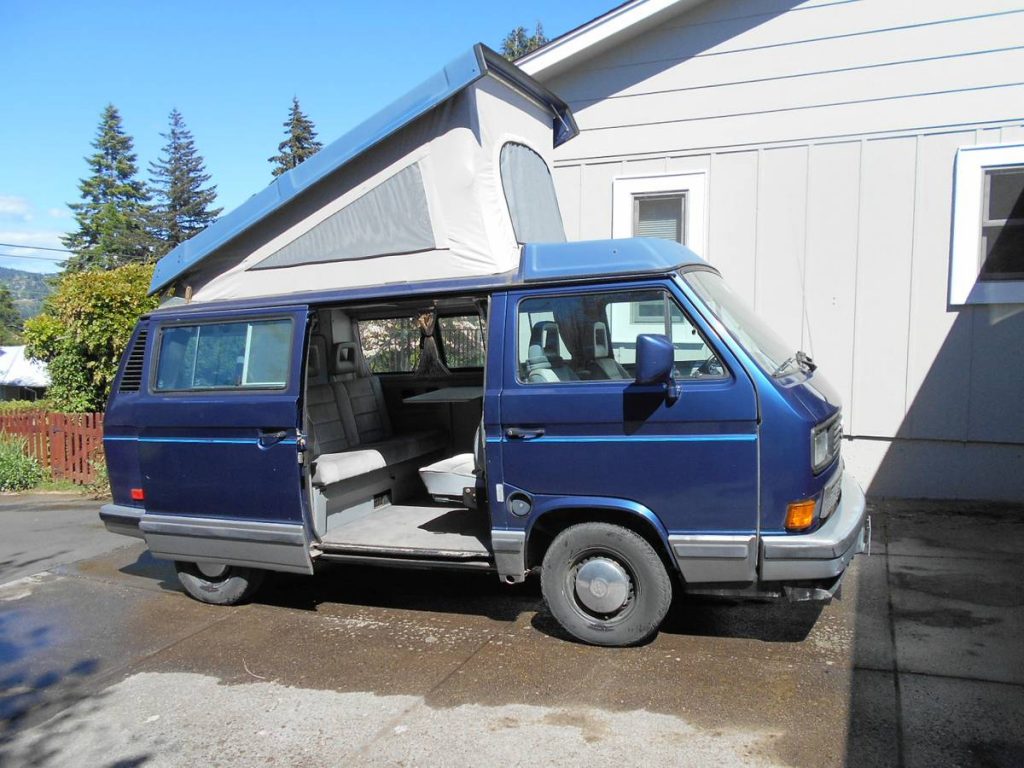
Anyway, I kept the Craigslist search notification running while watching about a hundred Vanagons go by. This also reinforced to me that the late model pop tops were climbing out of my price range. Then it happened, last Friday at 4:30pm a miracle showed up. A 1990 Multivan in the deep Orly Blue color that I like. It was 150 miles away and best of all it was within my acceptable price range (more that I’d pay for a tin top, but a great deal for just the van I liked.) Before the bank closed at 6pm I had a cashier’s check and an appointment to see it the next day.
Here is a picture from the advertisement:
I checked it out and although it’s far from perfect paint and body, it’s perfectly fine by my standards and I really love the idea of working with the more spacious and lighter Multivan interior. This is a donor that I don’t need to restore. It’s in good enough shape to look respectable, but not so nice that I can’t explore the desert backroads with it. It has all the features I want in my perfect camper (pop top, weekender interior, one of my 3 preferred colors) so I can see it as my long term electric ideal.
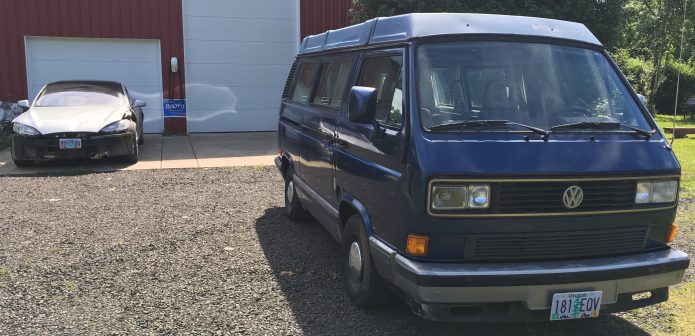
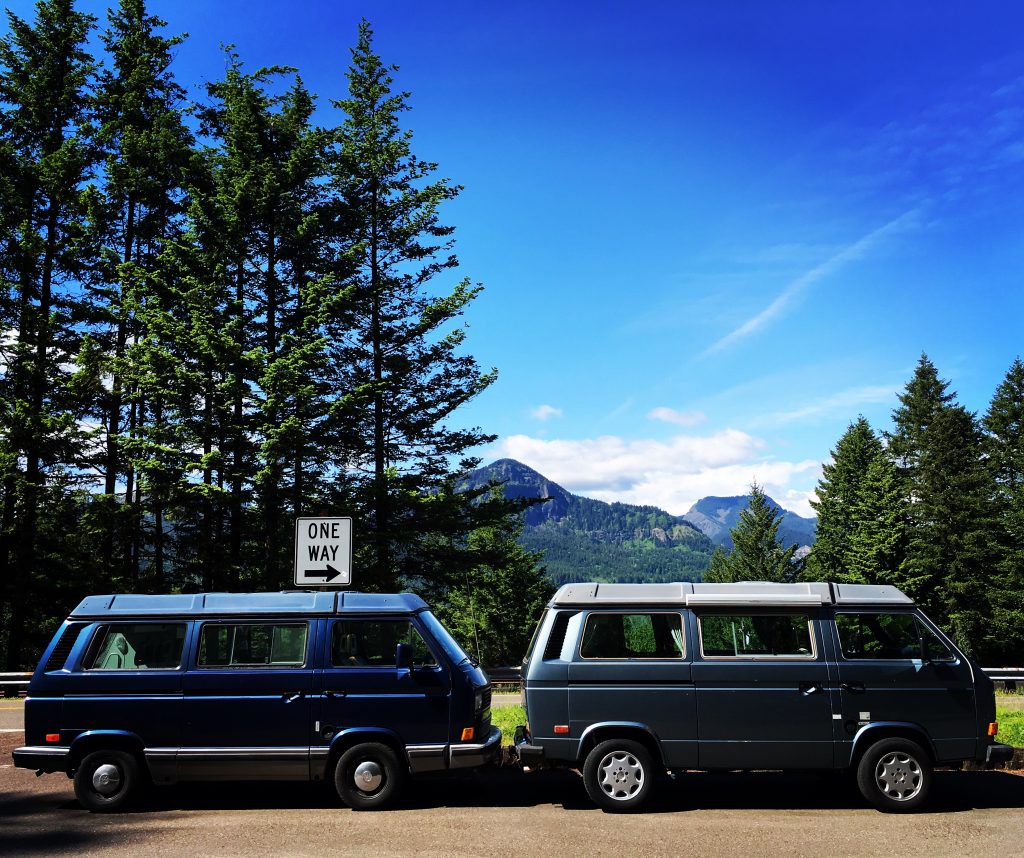
Returning from the picking it up in Hood River, stopping to hike some waterfalls. The 1987 ersatz camper “Blue Tattoo” on the right, and the new 1990 Orly Blue Multivan on the left.
What is the name of the new Westfalia Multivan? It has spent the last ten years as “Mitch Ryder, Devil With a Blue Dress” or just “Mitch” for short. I like the idea of naming my vehicles after songs, but am not sure if Mitch fits for this project. Tesfalia might be a cool option once it’s electric, as suggested sometime ago by a friend. What do you think?
With my delayed schedule, some people in this great cesspool of an internet have jumped to the conclusion that I’m just too addicted to driving the Wreckla to dismantle it and build the Stretchla. I can see how that might seem like a reasonable assumption but I’m here to tell you it’s not the case. I voluntarily chose to stop driving the Wreckla shortly after I verified proper charging at the Supercharger. Why I did that deserves some explanation. Normally I would find it fun to drive some hacked up barely legal unsafe vehicle on the street, so why am I not doing that now? It started with an email out of the blue from my local Tesla parts department:
“Due to the salvage status of your Model S , I have been instructed to cease providing you with parts. Tesla is very concerned about vehicles with salvaged titles being improperly repaired. Going forward, all salvaged vehicles must be inspected by us or our approved body shop, Precision Auto Body. If declared a candidate for proper repair, reconstruction must be completed by a Tesla-Certified Body Shop.”
Ouch!
Funny how one email can change so much.
I have no doubt that my Wreckla qualifies as the poster child of an “improperly repaired” vehicle. As you can imagine the email brought me a number of emotions. The first was a feeling of rejection. I like Tesla, I give them good money for parts, most of my investment portfolio is in Tesla stock, what have I done to upset them? Does Tesla not love me anymore? Fear; what am I going to do with the Stretchla if some crucial part breaks when I’m thousands of miles from home? Concern; what does this do to the salvaged and used Tesla market? Will people with salvage Teslas now be more likely to run them in unsafe condition, or even be unable to drive them at all? It stinks of big brother at first look, and I don’t know if I like it. They must have some good reason for this policy.
Once I got over the shock, I started to analyze what I figure this means to me, as well as for others.
First of all, it was not that big of a shock to me. I’ve heard of others with salvage Teslas unable to buy parts before me, I feel very grateful that I was able to buy as many parts as I did. I do wish that I had bought the front sway bar and drop link before this happened, but I’m sure I’ll find used parts somewhere.
I already learned that auto manufacturers have no legal requirement to provide replacement parts at all. They choose to supply individual parts for a number of reasons. For starters, if manufacturers didn’t have parts they would have to replace the entire car for any warranty issue. That could get expensive fast. There is also the issue of resale value. The resale value of a brand affects the desirability of cars and value falls quite a bit if parts and service are not readily available at a reasonable cost. In this case I expect this policy will reduce the resale value of salvaged Teslas quite a bit, but does that matter to the overall goal of the company to “to accelerate the advent of sustainable transport by bringing compelling mass market electric cars to market as soon as possible”? I estimate that less than one half of one percent of Teslas have been totalled. Maybe a few people will feel uncomfortable buying a car that would be unrecoverable from a salvage title event, but I suspect that in the end this policy will have a very tiny impact on the market for Teslas.
My primary question was “why are they doing this?” I asked if they had any more to say, but Tesla provided no further explanation so it’s up to us to speculate. The best explanation I’ve heard so far was from a friend who talked about the excellent safety record of the Model S and how it interacts with our dysfunctional media. Remember what happened when Tesla’s slowly caught fire many long minutes after impacting large destructive objects on the road? The media made a sensation out of a non-event and Elon Musk admitted demand for the Model S fell. Now imagine if you will, what would happen if I was killed in an accident in my unsafe Tesla? I can see the headlines now: “Man Killed in Model S, Are EV’s Safe?” (Note to media reading this, this is not a real headline, do not quote me out of context!) Maybe somewhere down in the fourth paragraph they might mention that I was driving a salvage title car with a cracked frame and the air bags disabled fully aware of the danger, but that’s not what the world would remember, they would just eat up the headline and believe the media fairy tale. Of course people die all the time in other cars, but this is still a special time for Tesla and the first fatality is bound to be a media circus. I hope it is still far off. (Edit: Since I first wrote this there has been one fatality of an alleged thief of a Tesla that split in in half using a light pole in Hollywood at a very high rate of speed)
I love that EV’s are finally being taken seriously. I believe it’s all due to Tesla succeeding in the market. I don’t want to risk an event that might have a strong negative effect on that success. That’s the reason I’ve parked the “Wreckla.” I still reposition it around the yard as needed and I did recently drive it to a shop where we drained the freon out of the air conditioning system, but since then I’ve even removed it from my insurance. Still, every time I open the door to that spaceship, my Slacker station starts playing and I’m all the more excited to get that system swapped over to the Stretchla!
As for others who own salvage Teslas, we’ll have to see what happens. The current wording of the statement is not very flexible. I expect that most any car that was “salvaged” was damaged so much that it did not make financial sense to repair it at a “Tesla-Certified Body Shop.” Most people that rebuild salvaged vehicles use less expensive methods like combining parts from many salvaged vehicles. This is the first that I’ve heard of a manufacturer playing at the role of safety police. It seems to me that Tesla puts itself in an odd position taking on the role traditionally held by government regulations of controlling safety. I’ve heard rumor that Mercedes has very different policy. I’ve heard they sell “safety relevant items” such as brakes and air bags at cost to encourage people to keep their cars safe. People have contacted me about these issues and already I know of some very unsafe “repairs” that are being done on Teslas to try to drive the car without Tesla support. Hacking may be encouraged as well so long as Tesla does not provide basic service access and especially when the service center refuses to work on unapproved salvaged cars. How many people will not be able to do something as simple as bleed the coolant due to being on a Tesla black list? I know that encourages me to find a work around which may persuade me to share hacking information with others. But I really don’t want to do that, I’m not sure that public hacks are in the best interest of safe vehicles.
The more I look at this question, the more difficult it looks. Personal motivation aside, I don’t know what I think is best for Tesla and their honorable mission. Tesla is still a young company, they have yet to publicly address Right to Repair pressures. I expect this policy is an early work and I hope it will change in time. I hope Tesla does allow independent facilities to access parts and basic necessary tool data. I’m keeping up the hope that Tesla is working on a longer term vision that will support all Tesla owners without relegating owners with branded titles, like me, to some sort of third class status.
As for getting parts I may need to keep the Stretchla running (once I finish it), I don’t know what I’ll do about that. Eventually there will be more wrecks in the junkyards, that should help. Maybe Tesla will mature it’s policy in some way that helps me and maybe they will release open repair tools too. I’ll just stay hopeful and play it one day at a time.
The Stretchla project is enjoying a pause in the action. The mental hurdle of starting auto-body work finds me procrastinating. Historically I’ve found I work on projects that I’m passionate about (like the Stretchla) in short intense bursts while ignoring other projects and obligations. It helps if a good milestone is in sight as it was before I chose to expand the scope of the project with with a nice paint job. The prospect of setting up the shop and learning auto-body work has my procrastination side deciding to catch up on some of those other projects.
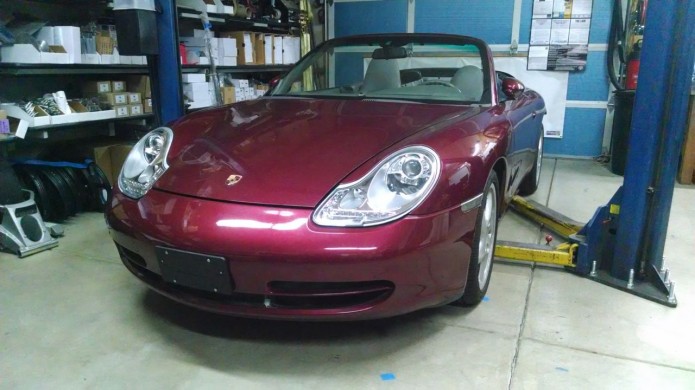
One of those projects that is quite fun involves driving unused gauges on a Porsche 911 electric conversion. Deb and I both wanted to become more familiar with using the Teensy 3.1 Arduino compatible board specifically for interfacing with CAN bus using the CAN bus controller that it has built in. Our board reads the Orion BMS CAN packets and uses that information to display battery state of charge on the original fuel gauge and battery temperature on the oil pressure gauge. Additionally we measure the motor field winding temperature using the sensor built into the Warp 9″ motor and we use that to drive the original water temperature gauge.
Here’s the video where I probably say the same things again 🙂
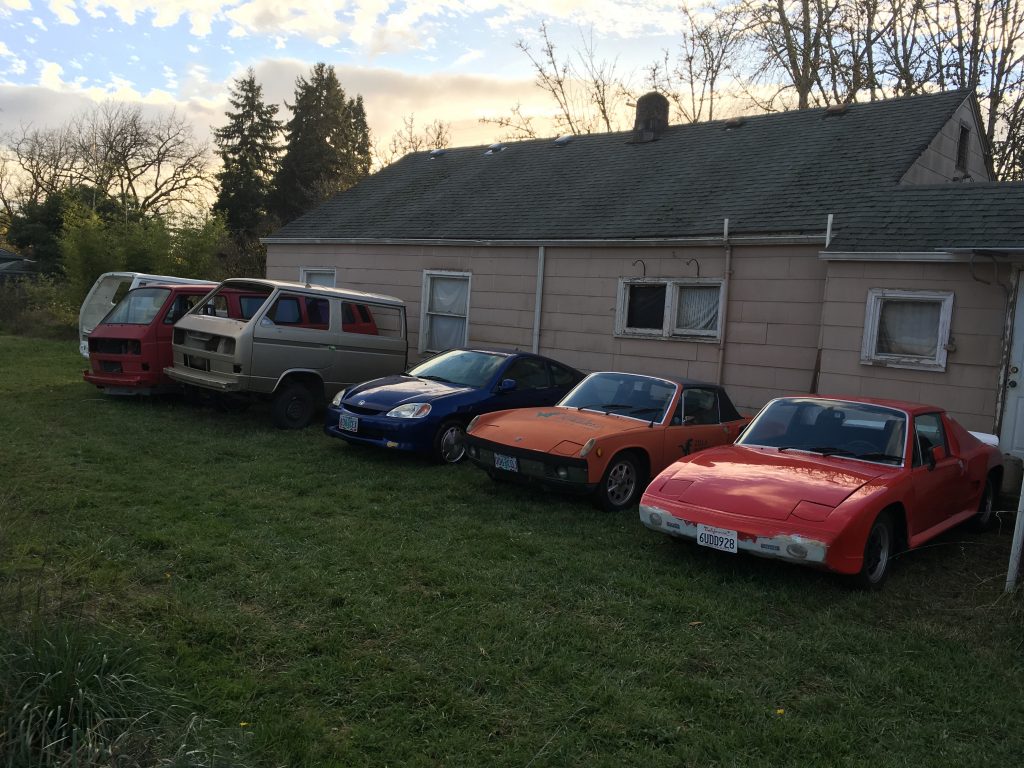
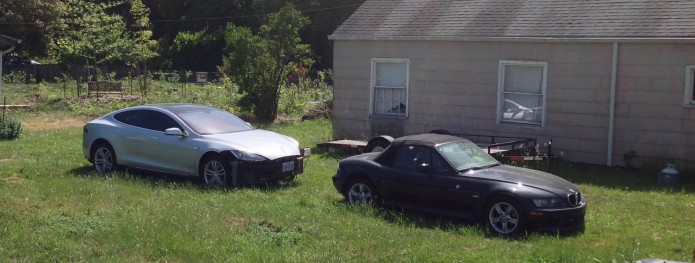
Gaggle of EVs
More EV’s inside
One Pretty Porsche
Kirk Swaney, the master of conversions
Under the hood
Power is in back
Testing on the bench
Wiring into the original gauges
Stack of boards
Fits in a small box
Switching voltage regulator
One-off documentation, just enough to reproduce it if needed.
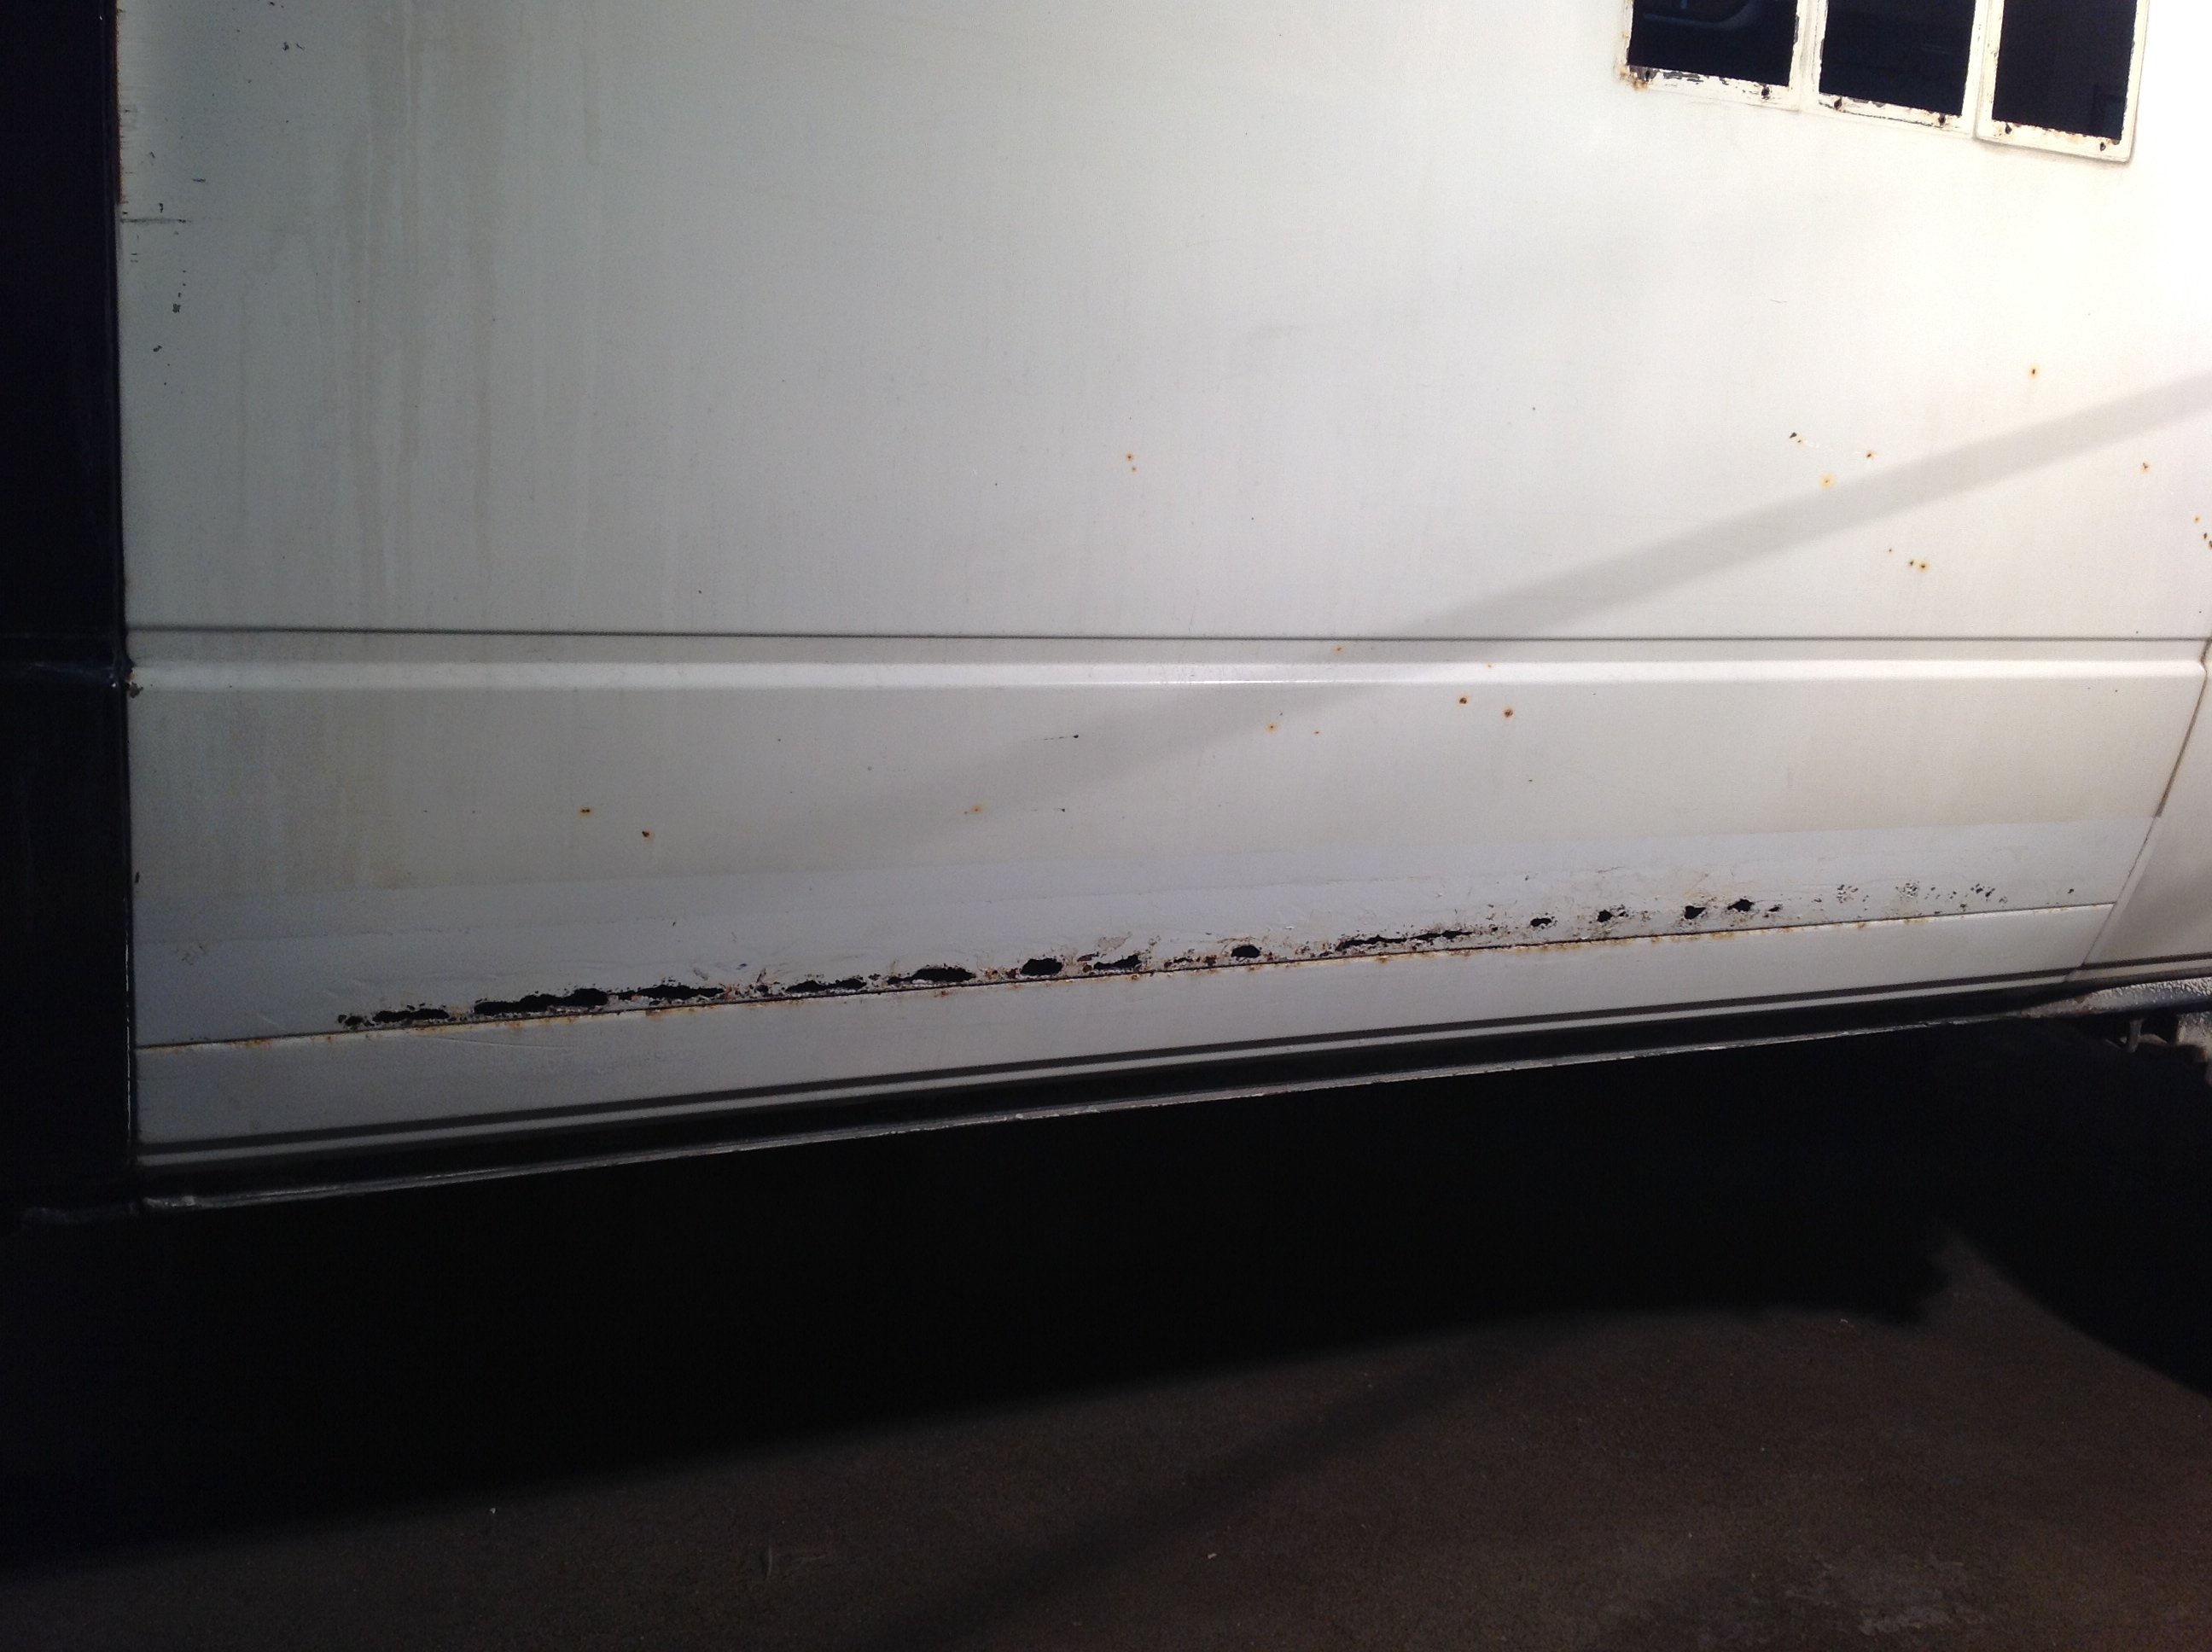
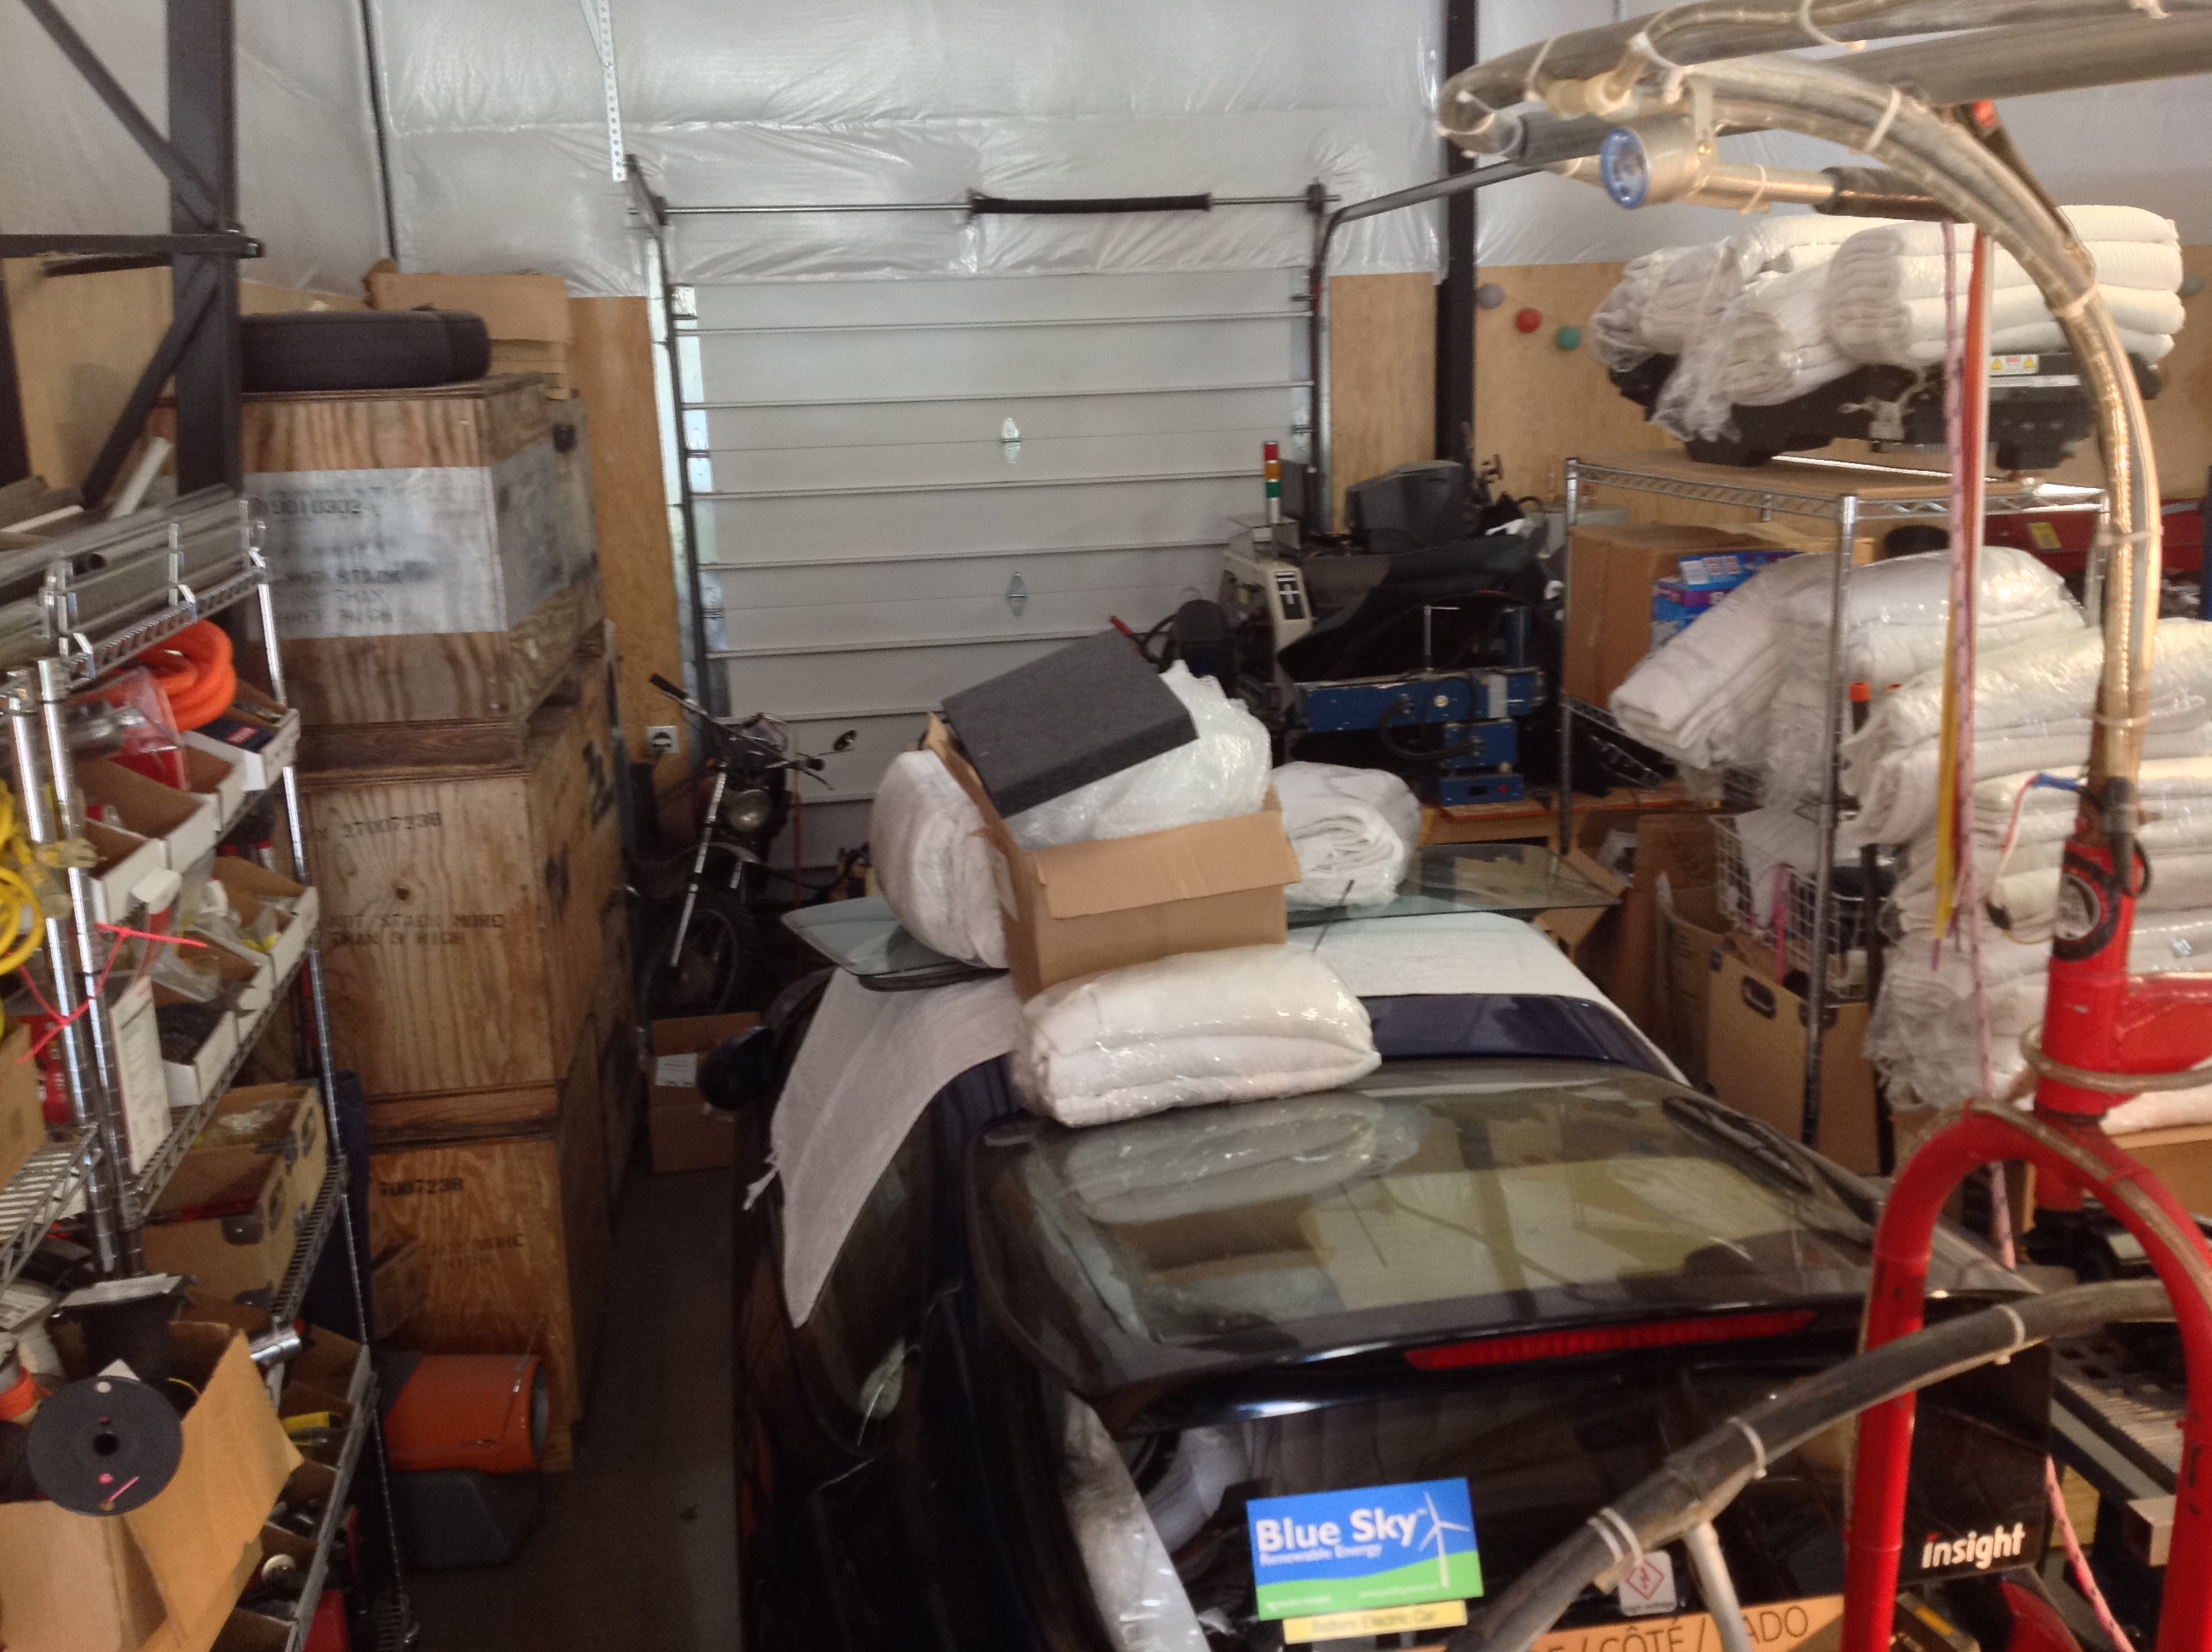
In my last update, while discussing a nice paint job I wrote: “spending months doing it myself is also not in the cards.” Well, sometimes the cards, along with my plans, change. I really did want to get the Stretchla up and running this summer, but as discussed earlier that would mean a very quick and dirty paint job in addition to months of stressful work. Since then a few things happened to change my plans. First off, a number of friends discussed the question of paint quality with me. “After all” they said “this is a popular project that will attract attention wherever it goes, do I really want my first interaction to be apologizing for the house paint?” Additionally, as I pulled the windows I found some rust holes that needed fixing. I could do some hack patch, but the truth is that the soft house paint is not going to work well under window seals. Now with all the windows out, the Stretchla is really begging for a proper paint job, inside and out. Either way the line of rust behind the camping gear needs work. If I can locate a larger replacement panel, I’d like to replace the whole thing to delete the obsolete camper connections while fixing the rust perforation that is often caused by leaking around those same connections. So far the scope of this project seemed pretty clear. By choosing this fork in the path a mountain is revealing itself through the fog. I can’t tell how big it is yet, but in my imagination it could be pretty big or maybe only a strenuous foothill. Learning decent quality bodywork has always been on my bucket list so it will certainly be an adventure. I guess the time has come to collect the tools and learn it. RestoLad is a great fun resource, he makes it all look pretty easy! 😉 I’ll need to make a booth to keep the rest of my shop from being buried in dust. The left side of the shop, with a nice roll up door at the far end should lend itself well to the job, as soon as I find somewhere to put all the unfinished projects stored there… If anyone is in the market for a large Trike (Burning Man art vehicle, needs work), Quad IVc SMT Pick and Place machine with feeders, a Honda Insight with EV-1 motor installed (project) or maybe a CNC router project please let me know so I can make some room! Although this mountain is making me hesitate a bit, I can’t blame it for my utter lack of progress in the last month. I’ve had a few other obligations show up which alone would have made me miss my electric summer travel plans. Those delays ease the burden of choosing the longer path since that means it wasn’t just the paint that screwed up my schedule. Hopefully I can get these other obligations wrapped up in a couple weeks and then struggle through the cleanup so I can get back to the fun parts of Stretchla project!
Sorry, no video this time, too busy to make time for editing…
Time to get moving!
Now that the Tesla Model S drivetrain and suspension are working well, it’s time to get moving on the transmogrification. My mid July deadline for driving to TMC Connect in Monterey, California is coming up quickly and I still have many unknown problems looming. At this point I hope the Stretchla is running, has at least one seat and makes it down there and back, I have no expectations that it will be anywhere near “finished”. There’s nothing like a deadline to focus work!
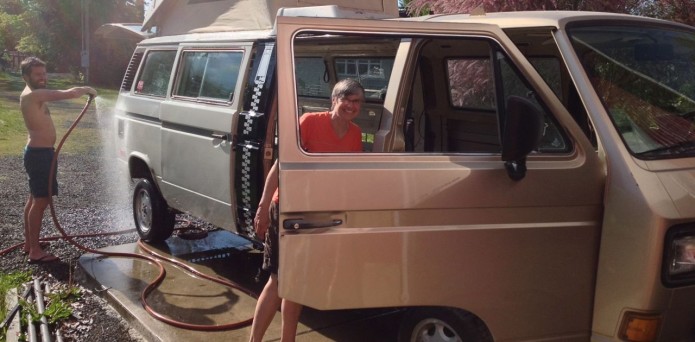
Preparation of the Vanagon Body
In the above picture my friends Arthur and Debbie happened to be here when the sun warmed up the day, fortunately I was able to rope them into helping with the car wash. The Vanagon body has a lot of parts attached to it that will not be needed in the Stretchla transmogrification. That’s a very good thing since the projected weight of it all worries me. In one of my earlier posts I cover the removal of the Stretch’s diesel engine and transaxle with Tony and Brandon. Now the time has come to strip out the rest of the parts that are not needed, as well as many parts that may or may not go back in once I’ve reviewed weight budgets.
Weights
Being rather large and made of steel, the Vanagon body is not light, especially since I added five feet to its length! The challenge is that I intend to use the original unmodified Model S air suspension, wheels and tires. The Tesla Model S is very light for a car with a 1300 lb battery pack since it is made mostly of aluminum. Car and Driver quotes the model S curb weight as 4,753 lbs and mine with some parts already removed weighs 4386 lbs. If I combine the GAWR (Gross Axle Weight Rating) of the front and rear, the Model S axles allow up to 6120 lbs. I expect to exceed that some, but I don’t want to take any one tire above the max 1653 lb tire rating. That would allow up to 6612 lbs total travel weight if I managed to balance the weight perfectly amongst the four corners. That’s only a 108% overload on the air struts and I feel comfortable with that.
How to keep it down to that weight? For one, I don’t intend to overload the van nearly as badly as I have in the past. At times in the last 14 years the Stretch has carried everything from over a ton of lead acid batteries, a piano, engines, copper piles, and once even a short trip with 16 people and 4 dogs. Over the years I’ve weighed it in various configurations coming in at 4790 to 7750 lbs depending on load and engine type. At this time I don’t know the total weight of the parts that I plan to use from the Model S, but I can guess it’s a large part of the 4400 lbs that I’m starting with. Since weight is such an unknown at this time, I’m starting to keep records. The Stretch, less the fuel, engine, transaxle and related supporting parts weighed 4140 lbs last week. The engine and drivetrain removal parts are reported to have weighed about 650 lbs at a truck scale adding up to an empty curb weight of 4790. In the pictures below you can see that I’ve removed about 1560 lbs (Stretch is now sitting at 2580 lbs) since that time and I’m keeping track of individual weights so I can decide which items will need a diet. The removed weights break down like this:
299 lbs of general camping gear piled in over the years. That includes the jacks, tools, microwave and inverter.
203 lbs of things that are probably not going back in including 70 lbs of stereo, 60 lbs of solar panel and the aluminum 40 gallon biodiesel tank.
410 lbs of original Westfalia built-in camping gear not including the pop top, this may need a diet.
153 lbs of things going back in like the sliding door and windshield.
505 lbs of parts that are not going back in like the radiator, dashboard, brake and clutch pedal cluster, batteries, main fuel tank, and 37.8 lbs of wiring.
The Trouble With Projects
The trouble with working on a large project like this is that it’s very hard to know where to stop. I have a deadline looming, but despite that the more I take apart the van, the more I think this is the perfect time to clean it up and paint it. But if I did that, where would I stop? How good of a job would I do?
One thing I know for sure is that a $20K paint job is out of my budget, and spending months doing it myself is also not in the cards. On the other hand there are plenty of rust areas that I’d like to treat and I’d like to freshen up the look as well. I owned my last Stretch for about a decade feeling frustrated with the lack of paint until I finally I gave up the idea of perfect paint and spent one day with high quality house paint using a roller to give it a “twenty-foot” paint job. A “twenty-foot” paint job is the kind of paint that looks OK from twenty feet away but as you get closer you start to wonder why it looks a bit like house paint! I was very pleased with the result even if car snobs didn’t understand the appeal. Aside from being very cheap and easy to do, another advantage of such a low tech paint job is that it’s easy to fix when I make body mods like adding the planned fender flares. I’m thinking I may do something similar here as what I did on the old Stretch. First I’ll see if I can borrow the pressure washer from my friend Josiah to clean alkali playa dust off the underside and treat the surface rust the dust created, then I’ll have to see about the rest. Years ago I snapped a picture of a Vanagon with a red and white paint job I liked very much, maybe I’ll head over to the paint store and see if they still sell high quality oil based enamels…
The Wreckla is almost ready to start its transmogrification into the Stretchla. It feels like progress is picking up lately. Although one might think it counterintuitive that I get more productive when allergy season hits, it makes sense when you consider that the small amount of Pseudoephedrine I take for allergies is basically some form of speed.
Air Conditioning
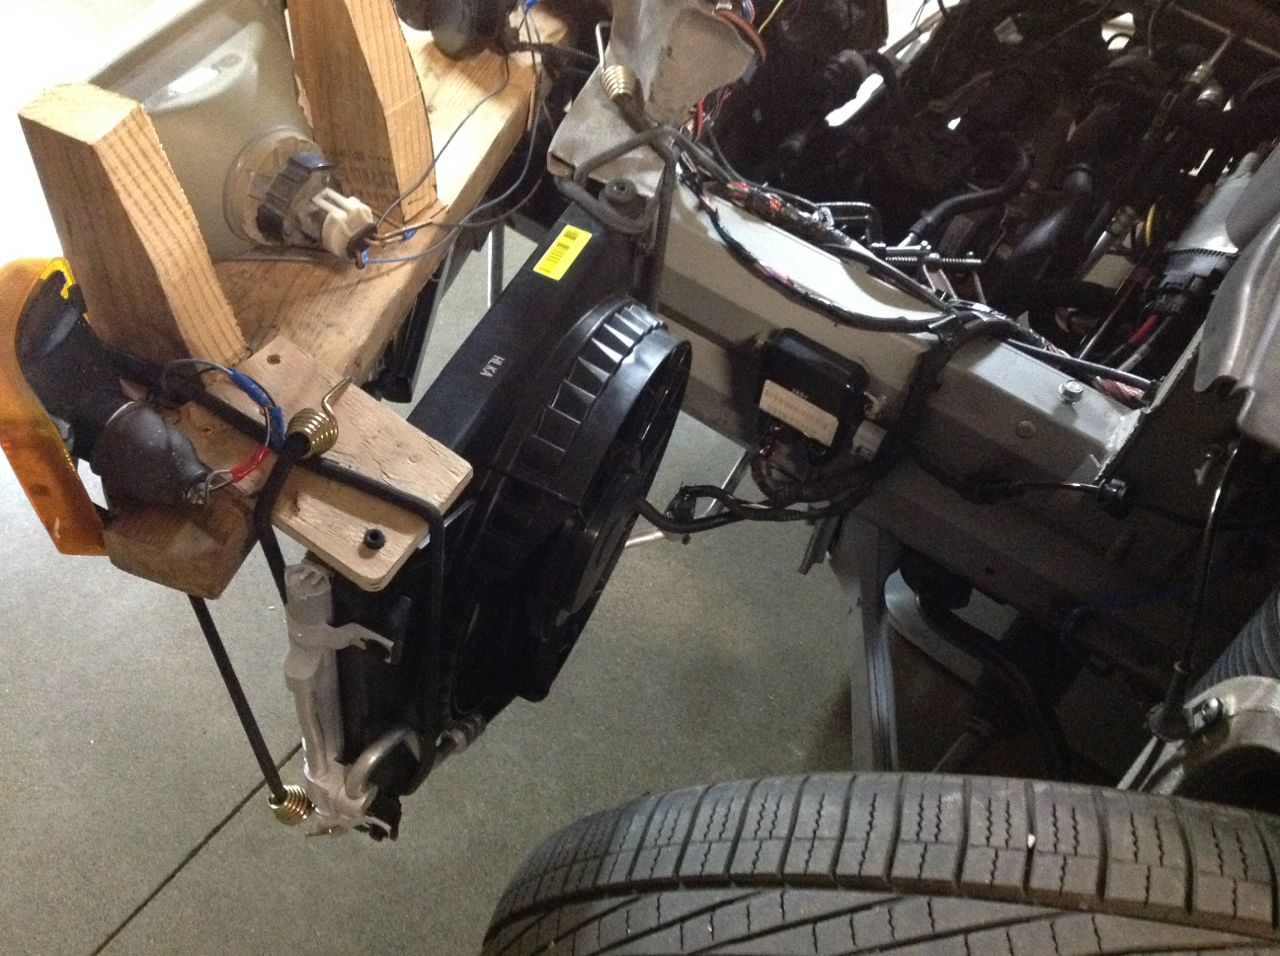
I wanted to insure the AC is working and also get comfortable with AC systems so I can modify them someday. To do that I needed an AC condenser on the left side of the Wreckla. I was resisting this a bit since the support that holds that part on the car was long gone. Fortunately a small plywood addition to my 2X6 DF headlight bracket plus a number of fresh bungee cords made for a surprisingly strong mount and it only took a few minutes to make. Road testing shows that it holds up to wind loading well above the speed limit.
Hacked installation of new AC condenser
Hacked installation of new AC condenser
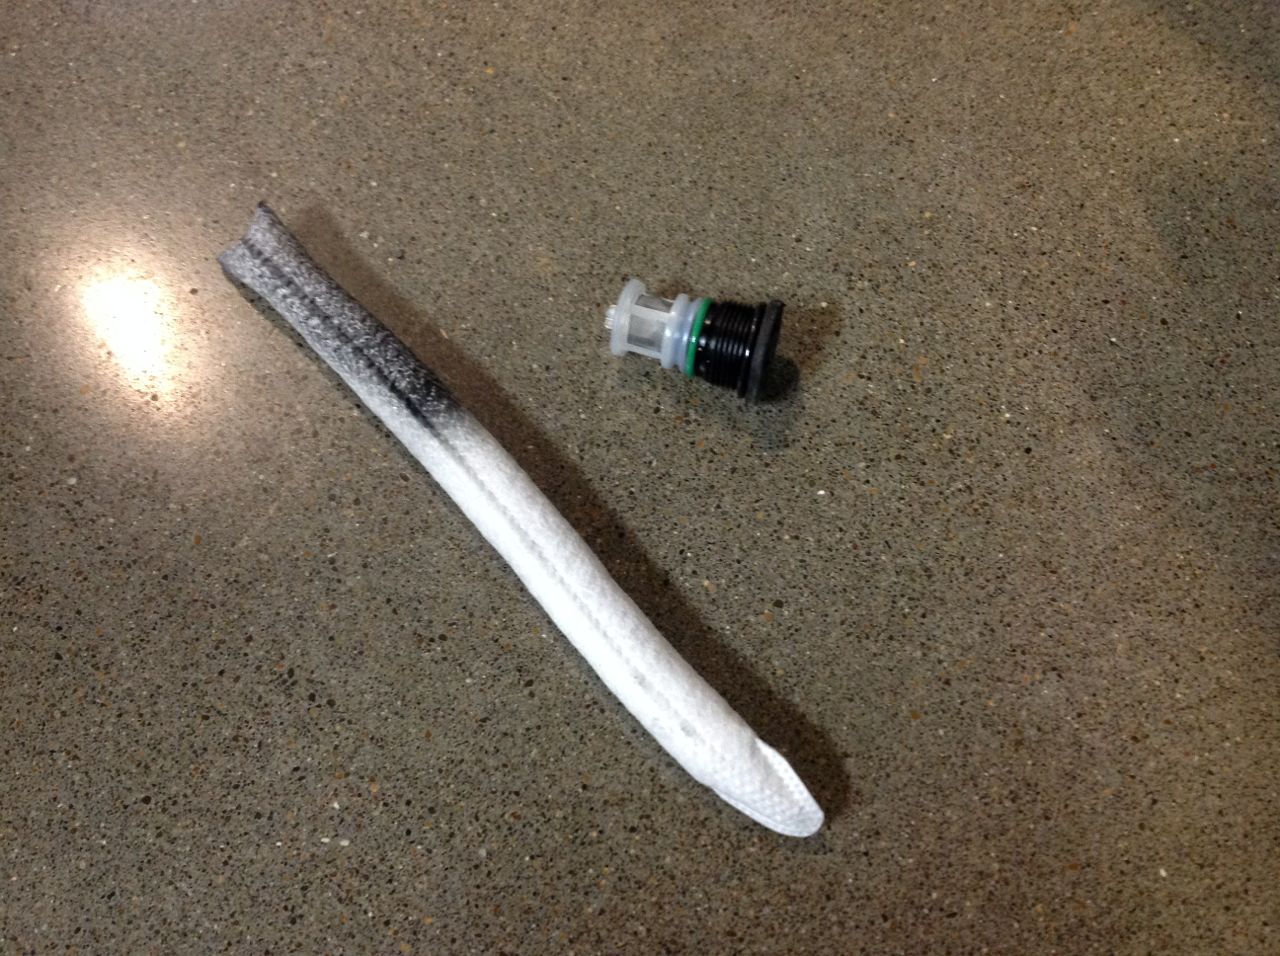
Since the system had been open for a long time, I replaced the filter and dryer which are located in the right side condenser on the Model S.
Modern style AC dryer and filter
My friend Ross owns Horton’s German Auto Repair and fortunately he’s a great guy willing to help me out with his AC service machine. Per his suggestion we left the car on the vacuum pump overnight and charged it up in the morning after a leak check. It’s a good feeling to have it charged up since the AC now works well and I assume that the system is required for Supercharging.
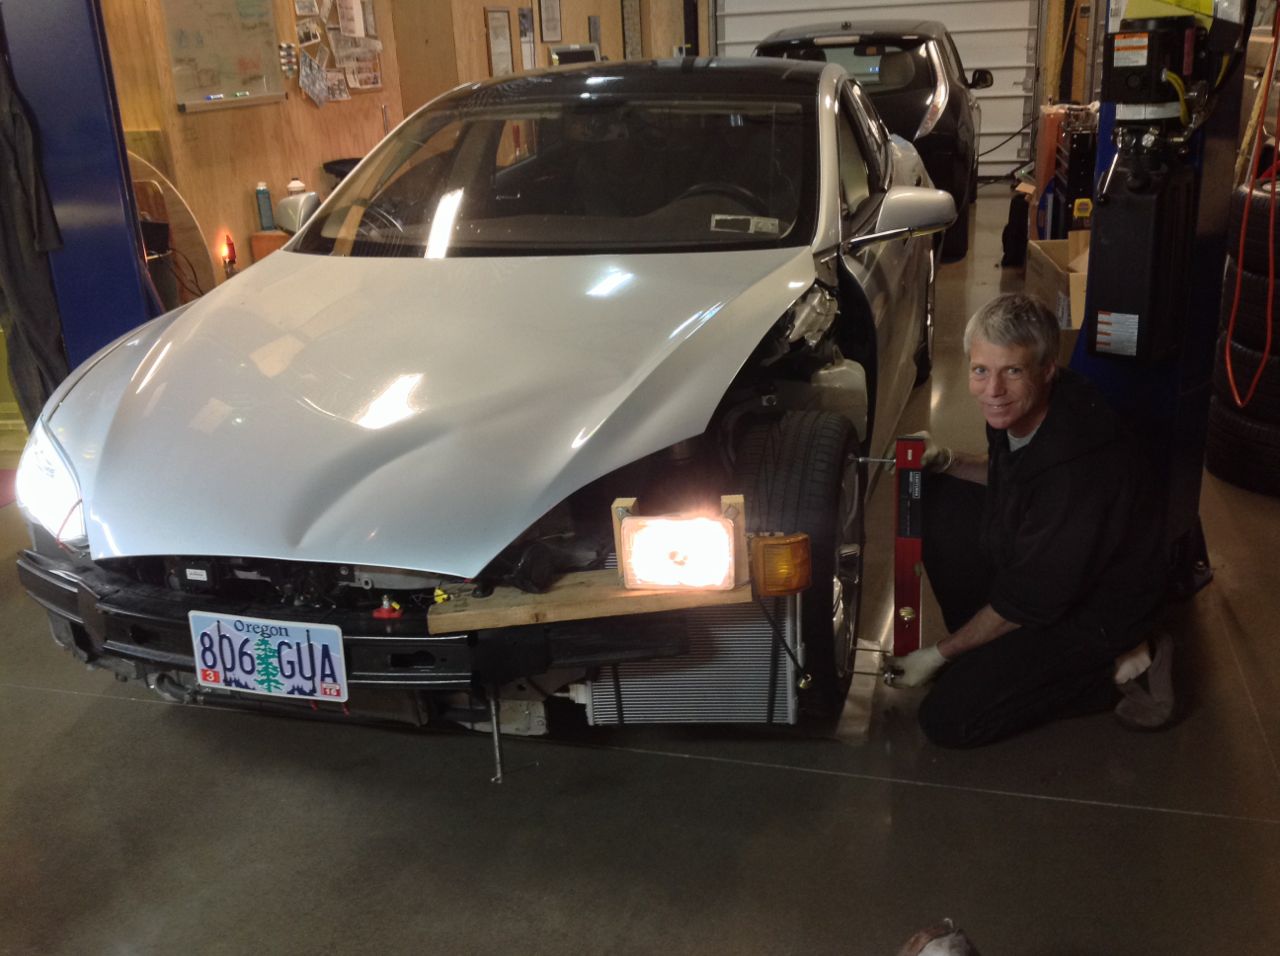
Setting the Caster
I wanted to set the caster on the front suspension. It was not really necessary at this stage, but I knew I’d feel better understanding how to do it. Many thanks to Christopher Schimke for his write-up on The Samba on DIY Wheel Alignment. Christopher supplies parts to help out many Vanagon owners with his company T3Technique.com. I already have a very nice super level diamond polished floor, but one of the great ideas I picked up from his post was to put wax paper under the tires to let them slide in place much easier. I found that half a turn of the Model S steering wheel is about 20 degrees and so I recorded a bunch of caster measurements at neutral and +- 20 degrees of turning, adjusting the front suspension until they were balanced left to right and camber was in spec. Years ago I made an addition to my digital level, adding bolts to contact the wheel rim of the Stretch, fortunately the mod also fits well on these 19″ Tesla wheels.
Setting caster
Charge Port Installation
I was concerned that people might get a bit freaked out if I were to pull up to the Supercharger and drape the cord into the rear hatch with highly visible orange high voltage cables (I’m sure the wrecked front of the car surprises people enough), so I spent a little time on “bodywork” to make the charge port and cover flap work properly in the original position. Along the way I discovered that the cover sensor is quite sensitive to the flap sitting flat on its latch. A little loosening of the flap mounting screws took care of the car warnings for the charge port being open. Not that it really matters, the car drives fine even if it thinks the port is open. The inlet was mostly undamaged in the accident but the impact did break half the mounting tabs. For now I used plastic repair epoxy to fix the broken tabs, but I’m concerned they won’t be strong enough for more than gentle handling. Although a new inlet assembly costs about the same as one from Nissan for a Chademo inlet, it’s almost a thousand dollars that I’d rather not spend for a couple broken tabs, so I’m still contemplating options to restore it to original strength.
Charge port and cover in close to the proper location
As for the Tesla taillight that I bought for such a great deal on ebay, it turns out that despite the sellers insistence that it was a US version, it wasn’t. It seems “ECE” does stand for European. Once I installed it I got an orange turn signal light which also lit up with the brake lights. It looked really cool, but for legality I went back to my US red light with the missing outer cover.
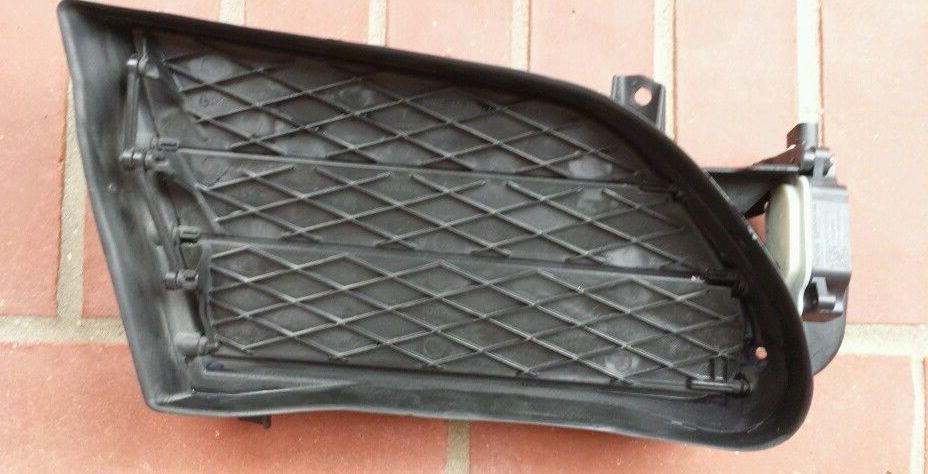
Louvers
I wired up the replacement louvers (also bought off ebay) with some connectors from Newark to replace the missing section of wiring harness. These are the two for the AC condensers and they seem to operate normally. I assume that installing them fixed a couple error codes, but I’ll have to wait until I get a report before I know for sure.
Collecting louvers
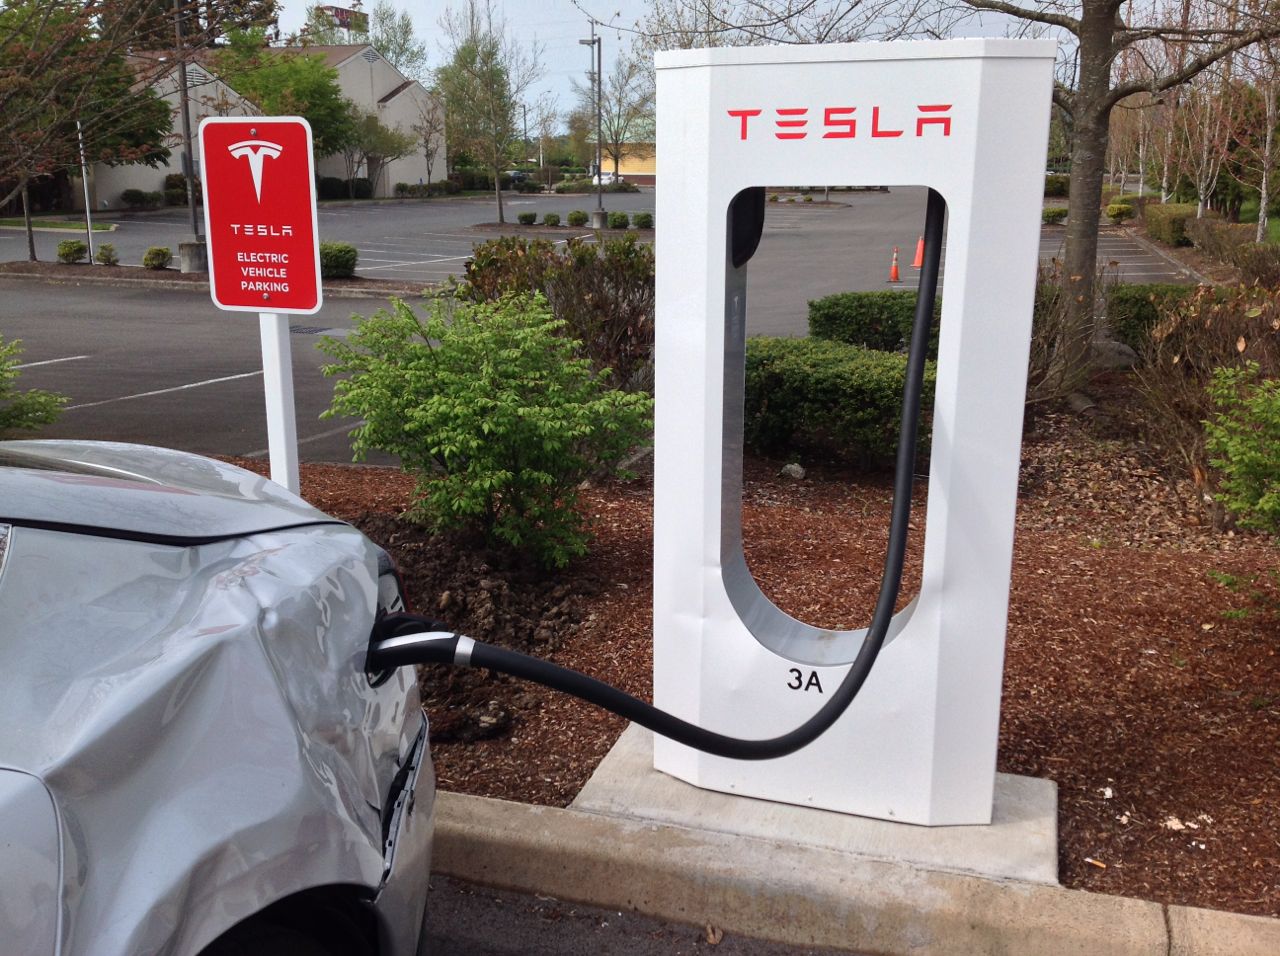
To the Supercharger!
With systems looking pretty good I headed off to my nearby Supercharger in Springfield Oregon. I was topping off the pack at home before I left just in case I couldn’t charge there and to allow for high energy use on the trip due to poor aerodynamics. In retrospect that was not needed and may not have been such a great idea for testing the Supercharging function.
Wreckla plugs in
I arrived and plugged it in.
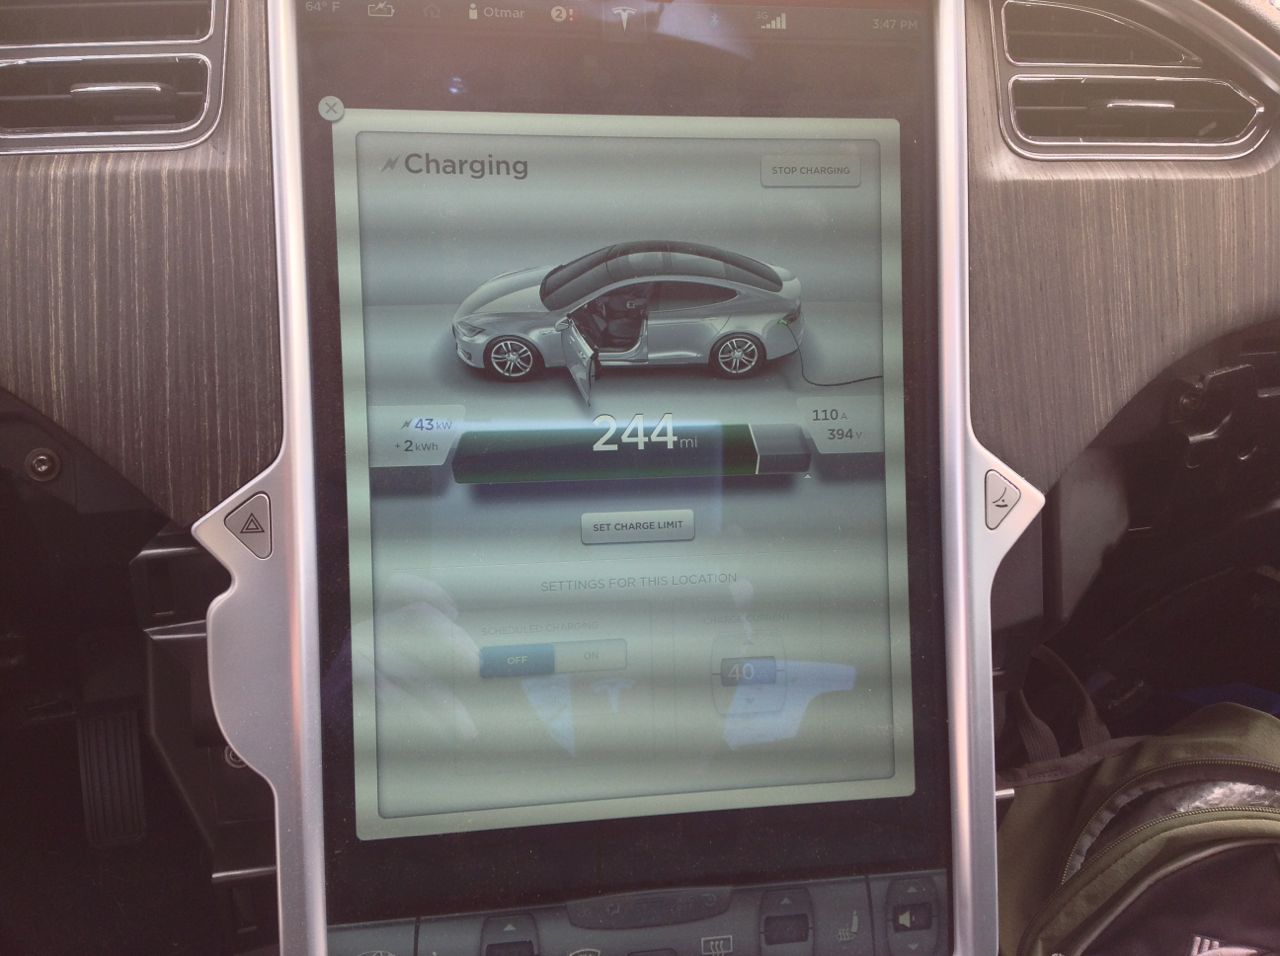
Supercharging at 110 Amps and 394 Volts, the battery was already pretty full
The car ramped up to 43kW charge rate which is probably normal considering it was over 80% full when I started. I was a bit surprised that the AC did not kick in to pre-cool the battery. I wonder if that was normal for a cool battery and low charge rate, or maybe something is not quite right yet with the system. I don’t know the car well enough yet but eventually I’ll get an error report to see how it performed.
Supercharging the Wreckla
Now that the car is running pretty well I’m excited to start preparing the Stretch Vanagon body for the swap. Maybe it’s time to take some base weight measurements and start cleaning it out. The real adventure is about to begin!
Over the past few weeks I collected more parts, did some “mechanicing” and now the wrecked Model S that I’m calling “the Wreckla” is running around town. It’s not pretty, but it is running pretty well.
While waiting for parts I got one of those random late night urges to work on it and ended up doing some rough body shaping on the left rear corner. My goals were only for the hatch to close, the taillight to point approximately in the right direction and the charge port to fit. I’ve been eyeing the porta-power type jacks at Harbor Freight for weeks, but when it came down to the wire I grabbed the 20 ton jack from my gear press and some handy wood scraps to do the job. Mostly it worked. Of course this sort of work goes much faster when you don’t care about the looks or long term integrity of the car. I still need to do a little more shaping before the charge port fits properly.
The latest suspension parts arrived at the Tesla service center quickly. John “Plasma Boy” Wayland offered to ferry them south from Portland. John and I appreciate any excuse like this one to hang out and plot epic projects. Deb was also here that day we all went out for Chinese food. John tells excellent stories . As usual we all had a great time.
Pretty soon I set aside a little time for good old wrench turning. With such a unique project it feels a bit anticlimactic to do simple parts replacement. There was one unfortunately installed bolt in the lower suspension that made things interesting. It seems that the lower control arm bolt would do better to be inserted from the front in order to avoid having to cut it, or drop the battery pack for control arm replacement. I’m told that engineering at Tesla has been notified of the concern. It feels great to have a car company that responds in a positive way to input from customers! Not having an extra suspension bolt handy, I chose to drop the main pack instead. This had the side benefit of giving me the opportunity to properly install the pack in a way that was safe for driving and was on my to-do list anyway. I replaced the bolt from the front when I put it back together and it’s a good thing I did since shortly after I reinstalled the high voltage battery I discovered I had mounted that suspension arm upside down. With the bolt in the “right” way it was an easy matter to flip it over.
When I tried to install the new fan controller I discovered the studs that hold it to the aluminum frame had both been sheared off. This presented an opportunity to use one of my favorite fasteners, the rivet nut. I love rivnuts for putting threads in sheet metal. They are very handy, especially in automotive modifications. I use the Zink Yellow-Chromate plated steel ones to reduce dissimilar metal effects on aluminum.
The suspension went together smoothly as expected. I chose to replace the hub assembly just in case the bearings were damaged in the accident. I replaced the ride height and wheel speed sensors, bled the brakes and discovered that the front sway bar was bent more than I remembered. I’ll probably want to replace that. I was surprised that I could bend it back into shape at all, but I didn’t move it far enough and having been bent once I no longer trust its integrity.
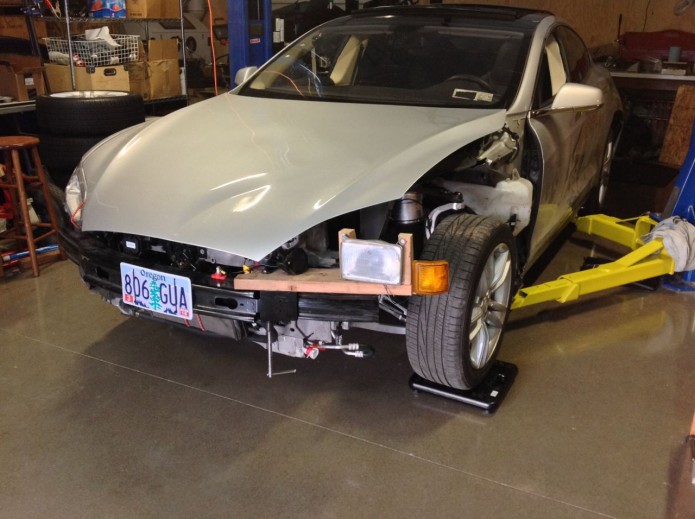
Once the car was sitting on four wheels again (the first time since the accident!) I worked a bit on ride height and basic alignment. I’ve worked out simple ways to set toe in and camber in the shop (much of that can be done by eye if you know where to look) but caster is something I have not yet set using my simple tools. Maybe I’ll learn to do that on this project since the car is pulling slightly to the right. I think it’s not that important until I get the suspension installed under the Stretch.
Now that it was ready to drive, I needed to quickly get it looking quasi legal since it was Friday and the DMV was about to close for the weekend. So far the Tesla had not complained that I used a Vanagon heater core as it’s “radiator” so I went a bit further and “installed” a Vanagon headlight and turn signal on it. The same douglas fir 2×6 that helped straighten the rear corner was enlisted to support the lighting with the help of a C-clamp. Friends suggested I could finish the humorous look with a log strapped to the front as a bumper extension, but we never got around to that. The trip to the DMV was uneventful. Oregon seems to be one of the more free states in that way. Thier concern was that the VIN and emissions stickers were correct (emission sticker was finally found on the rear hatch) and they seemed uninterested in the lack of front fender or any other safety issues. I hear that some cities in Oregon require fenders, while others do not. That makes sense since many hot rods lack fenders and here in Oregon hot rods are big business.
At this point the ride height was still a bit off, so I spent some time finding the CAN packets that report ride height from the air suspension computer and then adjusted (bent) the old damaged ride height sensor bracket until the four corners were close to the same readings. I have a friend with a very expensive computer interface made for adjusting things like air ride height on luxury cars but unfortunately Tesla is not yet an option on the menus. If any of you happen to know the year make and model of car that also uses air suspension made by Continental, please let me know. I’m wishfully hoping this tool might allow me to properly adjust the ride height if I can figure out what car it should act like while connecting it to the CAN bus that is wired to the air suspension computer. Otherwise, I may run the “Wreckla” up to the Tesla service center to get it calibrated and the codes cleared.
I’ve been collecting a few more parts and tools. I recently won a louver on ebay and expect to get it any day now. Deb and I have paused our LIN work, though it’s very close to the point of testing on the car. I’m unsure if we’ll pursue that or not at this time since the running car is distracting and there are seemingly more important things to fix for now. Maybe I’ll find enough stock louvers so I can use them instead. Ironically I found a set of four air struts for less money that I paid for one new one. I bought them anyway so I’ll have spares in case I blow one out and need a replacement. On the subject of potential overload, I also bought a set of 7000lb car scales so I can keep track of weight budgets along the way.
My next priority is probably to get the cooling system worked out. That means somehow mounting the left AC condenser and charging the system. Then there won’t be much left to fix before I start moving parts to the Vanagon body. Summer is coming up quickly, I want to get some faster progress on the project so I can go camping!